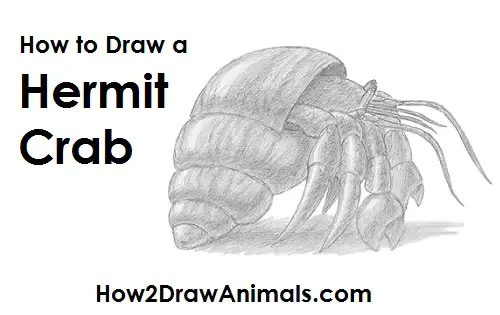
Please PAUSE the "How to Draw a Hermit Crab" video after each step to draw at your own pace.
For the first few steps, don't press down too hard with your pencil. Use light, smooth strokes to begin.
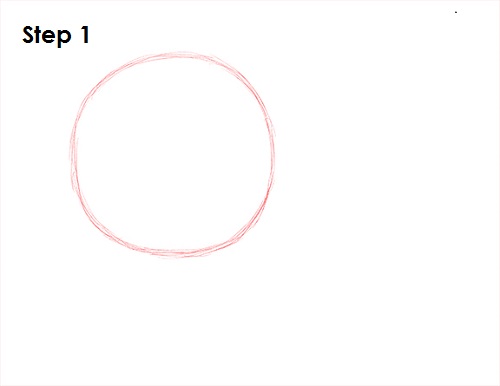
Step 1: Draw a circle as a guide for the top part of the shell that will house the hermit crab. The circle doesn't have to be perfect. It's just a guide. Leave enough room on the right side for the hermit crab's actual body.
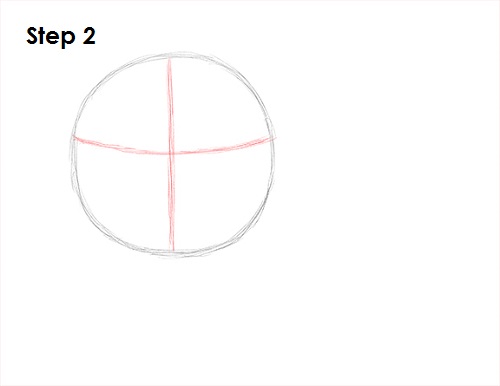
Step 2: Inside the circle, draw two intersecting lines. These lines will help you place the shell's detail later on.
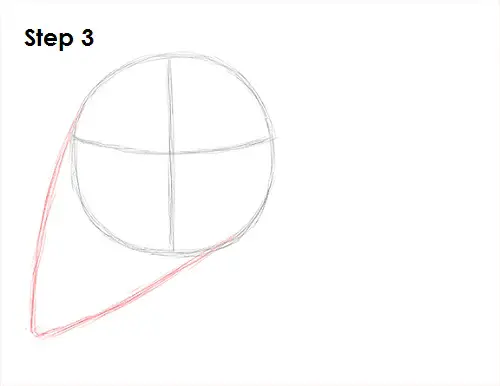
Step 3: Draw two curved lines that come to a point on the lower left side of the circle for the bottom part of the hermit crab's shell.
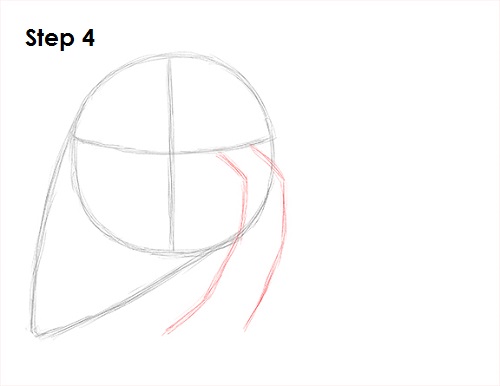
Step 4: Draw a couple of lines on the lower right side of the circle for the first set of the hermit crab's legs. Start the lines at the horizontal guide line. Angle the lines along the way to indicate where the leg's joints will be.
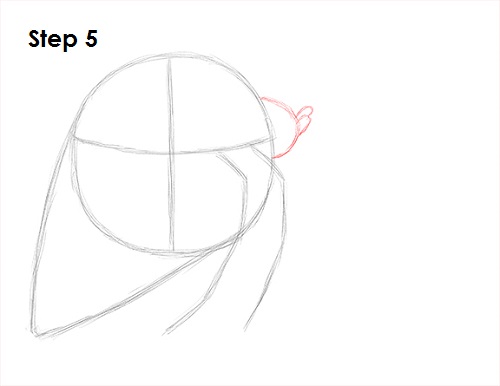
Step 5: Draw a curved line on the side of the circle as a guide for the hermit crab's head and two tiny arcs on the head as a guide for the eyes.
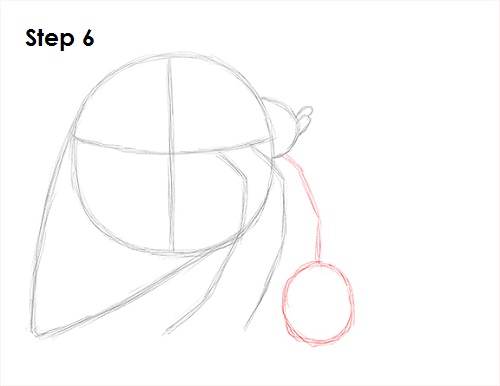
Step 6: Draw another line that starts under the hermit crab's head and ends in a circle. This is a guide for the crab's front leg and claw.
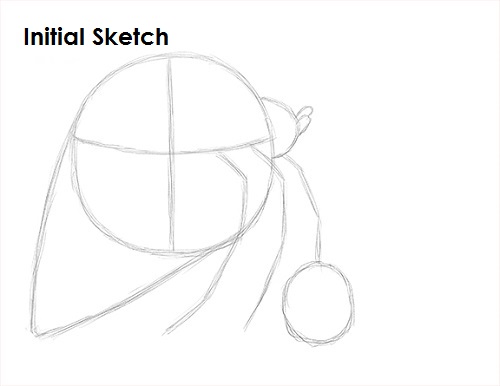
That's it for the initial sketch! From this point on, press harder with your pencil to get a more defined sketch.
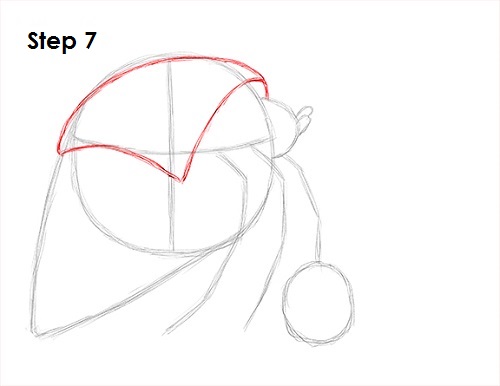
Step 7: Draw the top part of the hermit crab's shell by using the initial circle and the lines inside as guides. Draw a curved line on the top right of the cirlce for the shell's opening. Add another curved line near the middle of the circle on the left side. Use the initial lines as guides. Use the top part of the circle as a guide to draw the top of the shell.
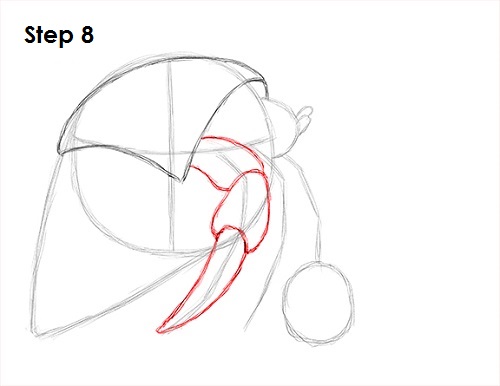
Step 8: Use the curved line on the left as a guide to draw one of the hermit crab's legs. Lightly sketch the shape of the top segment of the leg as you follow the basic path of the line. Darken the segment when you get the structure right and move on to the segment below it. The second segment is shaped similarly to the first. Sketch lightly at first as you continue to follow the path of the guide line. The last segment comes to a point at the bottom. The hermit crab's leg should curve to follow the path of the guide line.
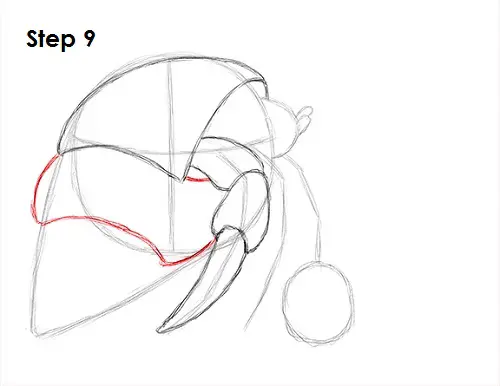
Step 9: Draw the second segment of the shell. Hermit crabs use different shells as their homes, so you can draw yours differently if you'd like. This segment is made up of a couple of curved lines. Use the bottom part of the main circle and the other lines as guides.
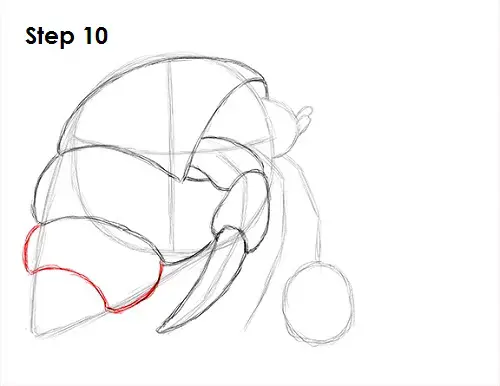
Step 10: Draw the third segment of the hermit crab's shell as a smaller version of the second segment. Use the initial lines as guides.
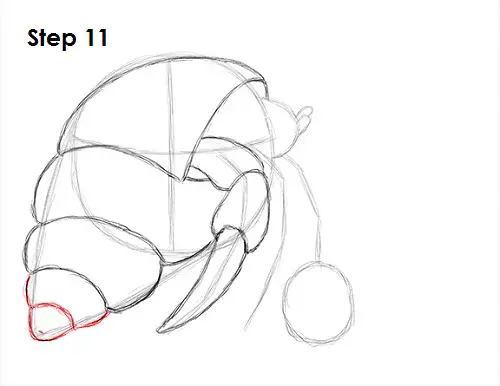
Step 11: Draw the fourth segment as an even smaller version of the previous shape and the bottom segment as a rounded tip.
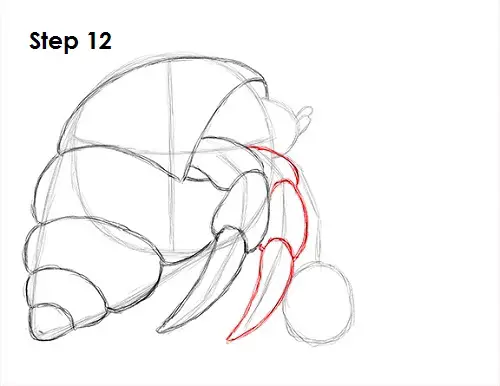
Step 12: Draw the hermit crab's leg in the middle by using the initial line as a guide. Use the first leg as a template as you draw the middle leg. Follow the basic path of the guide line. Hermit crabs have other appendages, but they're inside the shell, so don't worry about drawing those.
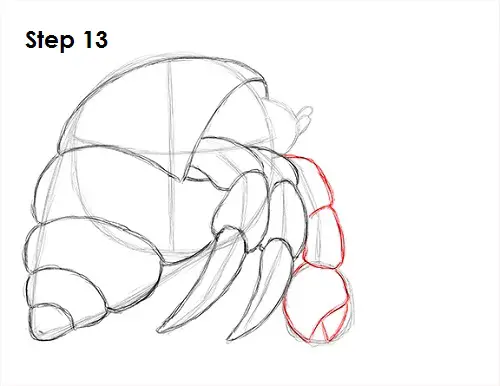
Step 13: Use the line with the circle on the end as a guide to draw the hermit crab's claw. The first two segments should be similar to the other legs. Follow the path of the initial lines as you draw them. Draw the open claw by using the circle as a guide. Draw the left side of the claw first and then the right side.
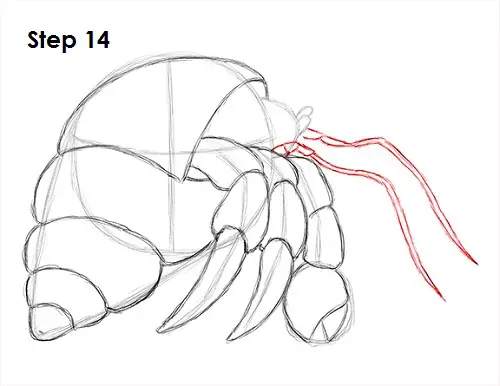
Step 14: Draw the two antennae coming out of the hermit crab's head. Draw a couple of segments at the base, then two long curved lines that come to a point. You can draw your antennae with a different shape or length if you'd like.
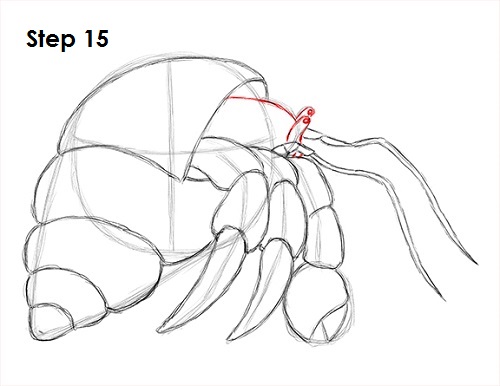
Step 15: Use the initial lines on the top right as guides to draw the hermit crab's head and eyes. Darken the lines as you create the shapes. Shade the tips of the small arcs for the eyes.
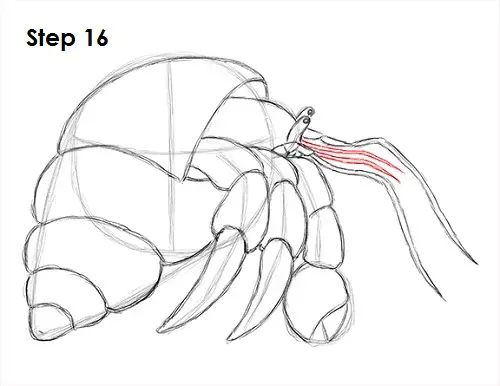
Step 16: Draw the pair of antennules in the space between the hermit crab's two antennae. Draw them the same way as the antennae, but make these thinner and shorter.
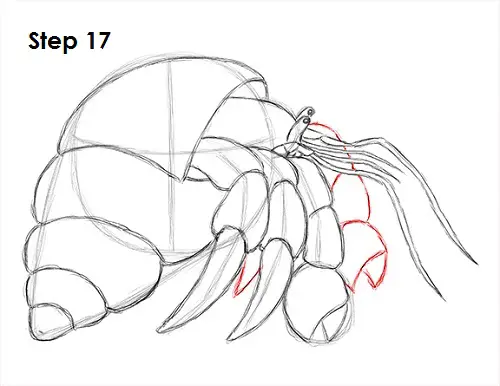
Step 17: Draw the appendages on the other side the same way as the ones on this side. Use the first claw as a template to draw the hermit crab's second claw. Make it smaller because of the perspective. Draw the visible portion of another leg on the left. The leg in the middle is hidden behind the legs on this side.
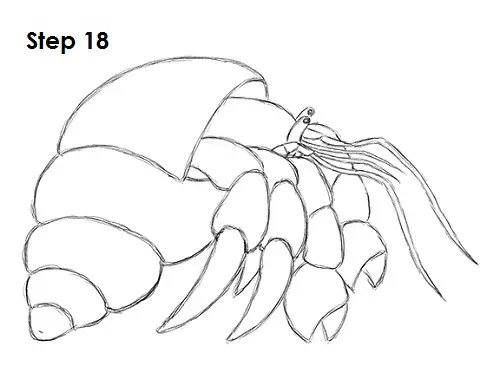
Step 18 (optional): Erase as much as you can of the initial guides for a cleaner look. Don't worry about erasing all of the guides. It's okay to leave some behind. Re-draw any final sketch lines that you may have accidentally erased.
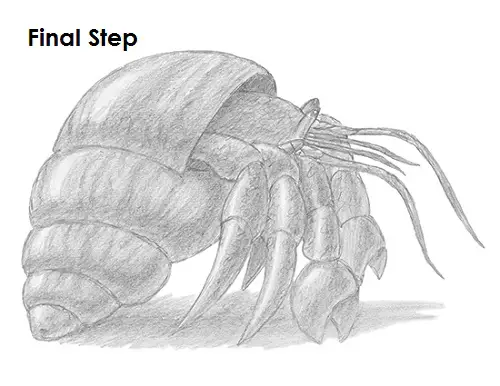
Final Step (optional): Add some shading to your hermit crab drawing to give it more dimension and volume. Pick the direction of the light source when shading so that the shadows are consistent with it. Keep in mind the contours of the shapes as you add the value. Shade the individual segments of the shell in a similar way and then move on to the legs. Vary the pressure on your pencil to get different degrees of tonal value. Shade the other legs the same way. Leave a small section on the legs blank as well for a shinier texture. Add value to each individual segment at a time to break up the shading.
Add a cast shadow underneath. This helps ground the hermit crab so it doesn't appear to be floating. Use a darker value near the middle of the shadow and a lighter value along the edge for the shadow's diffusion.
You can add more value throughout your drawing for extra detail. You can leave a few sections along the shell blank to make it more shiny. Try to add the value smoothly across the body for a shiny look and avoid a rough, gritty texture. Shells come in a variety of patterns. To add stripes like this, alternate between dark and light values. Certain shells are painted by hand and can have unique patterns like spots. So shade yours however you'd like. It's also a good idea to use reference if you want a more accurate drawing. If you have a pet hermit crab, try to duplicate it's look on your drawing. Shading can be time-consuming, so be patient and take breaks. Remember to pause the "How to Draw a Hermit Crab" video after each step to draw at your own pace.
Thanks for watching! Subscribe to the
How2DrawAnimals YouTube Channel for a new tutorial every Tuesday.
To learn how to draw popular cartoon characters, visit
EasyDrawingTutorials.com.







