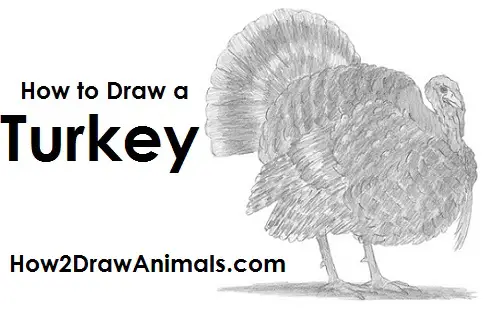
Please PAUSE the "How to Draw a Turkey" video after each step to draw at your own pace.
For the first few steps, don't press down too hard with your pencil. Use light, smooth strokes to begin.
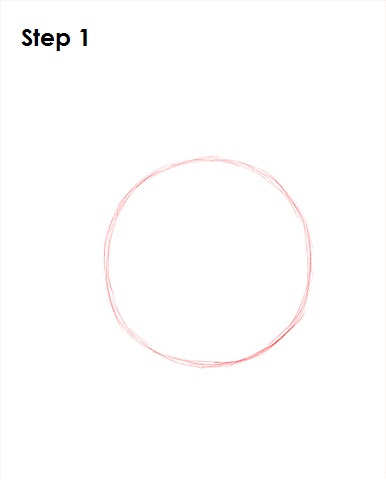
Step 1: Draw a big circle as a guide for the turkey's body. The circle doesn't have to be perfect. It's just a guide.
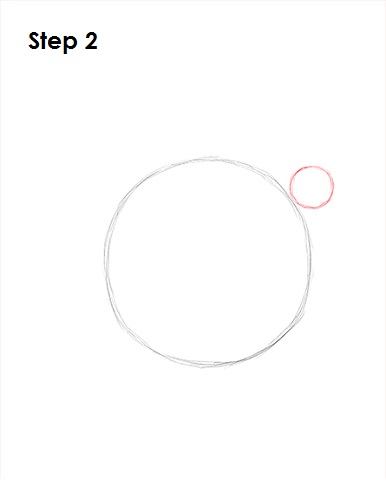
Step 2: Draw a smaller circle on the top right side of the body as a guide for the turkey's head. Turkeys' heads are quite small compared to their bodies, so make this circle very small.
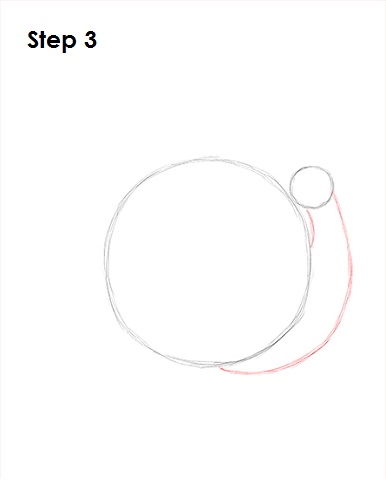
Step 3: Draw a long, curved line on the lower right side that connects the head to the body as a guide for the turkey's neck.
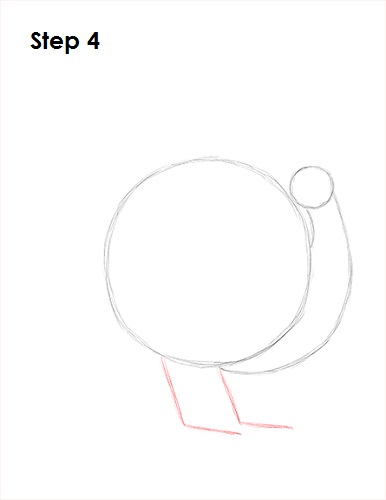
Step 4: Draw two L-shaped lines under the turkey's body as guides for the feet.
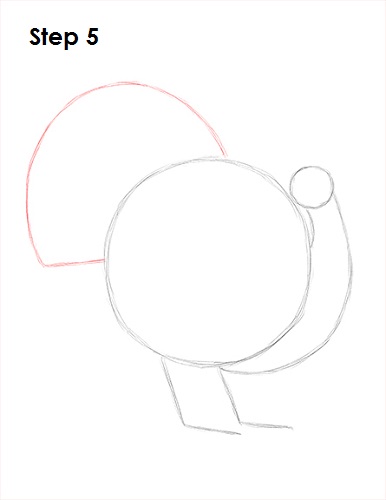
Step 5: Draw a line on the upper left side of the body as a guide for the turkey's tail feathers. The top of the line should curve, while the lower part should be flat and horizontal.
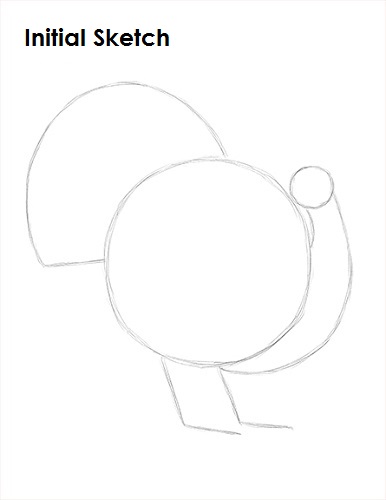
That's it for the initial sketch! From this point on, press harder with your pencil to get a more defined sketch.
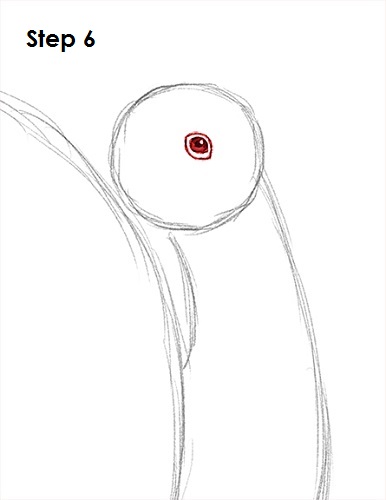
Step 6: Draw the eye inside the turkey's head as a small circle. The eye should be near the middle of the head. Add a small dot inside for the pupil. Shade the inside of the eye except for a tiny circle to represent glare. When shading, use a value that's lighter than the pupil. Add some lines around the eye for extra detail.
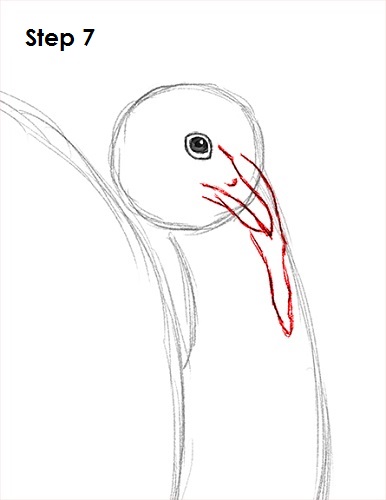
Step 7: Draw the turkey's beak on the lower right side of the head. The top part of the beak is a bit wavy because that's where the loose skin will be. The mouth is a straight line. Add a small line below the turkey's mouth for the lower part of the beak. Draw the fleshy piece of skin called the snood on top of the beak. The snood basically consists of a long, curvy line on the other side of the beak.
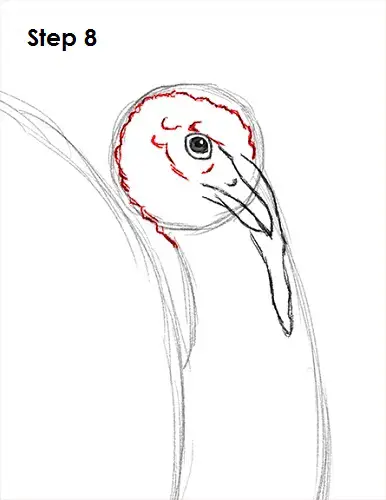
Step 8: Use the small circle as a guide to draw the turkey's head. Follow the basic path of the circle and make the head bumpier as you darken the lines. Add a few more lines inside the head for the bare skin texture.
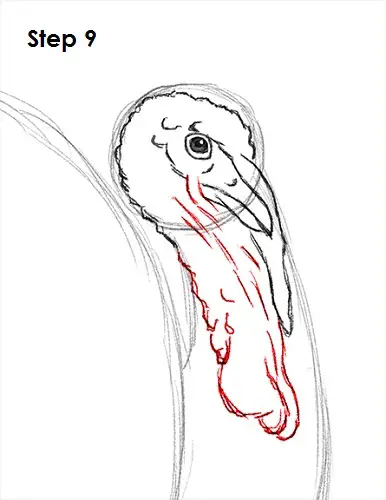
Step 9: Use the lines under the turkey's head as a guide to draw the neck and the dewlap or wattle. The wattle is just loose skin on the neck, so don't worry if it's not perfect. Just draw it using long curved lines.
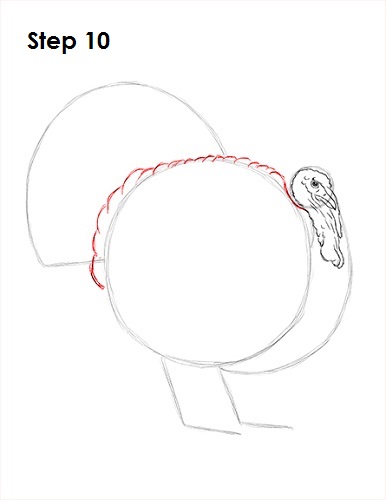
Step 10: Use the original circle as a guide to draw the top part of the turkey's body. Follow the edge of the circle as you draw small curved lines overlapping each other to form the feathers.
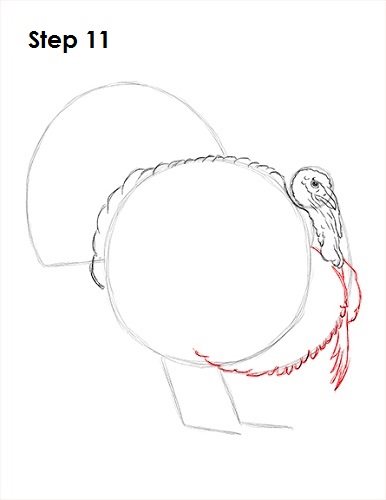
Step 11: Use the curved line as a guide to draw the front part of the turkey's body. Draw small curved lines along the path of the guide line for the turkey's chest feathers. Add the chest feathers on the other side and a few long lines for the feathers in between called a beard.
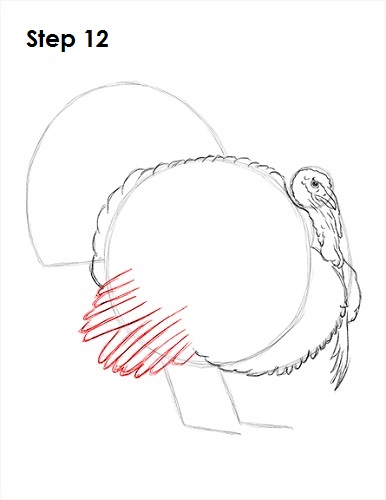
Step 12: Draw the turkey's wing feathers on the lower left side of the main circle, which just consists of a series of long lines that curve along the bottom. The top set of lines has a diagonal orientation, while the set under them is a bit more vertical.
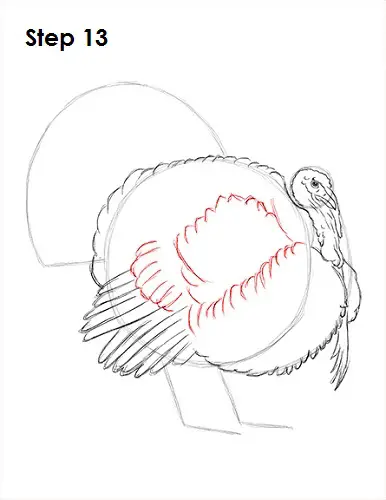
Step 13: Add a few more small curved lines inside the body for the edges of the wings and chest feathers. The first row of curved lines is inside the circle on the lower right side. The second set is shaped like an arc above it. The last set of curved lines is close to the wing on the left side.
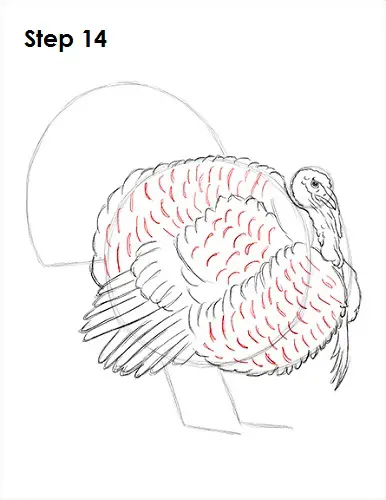
Step 14 (optional): Add a few more curved lines within the shape of the body for more feathers. Don't worry about this step too much if you plan on shading your drawing later on. Your curved lines don't have to be exact. Just add them all over the turkey's body. Don't overthink these lines but try to draw them with the proper orientation.
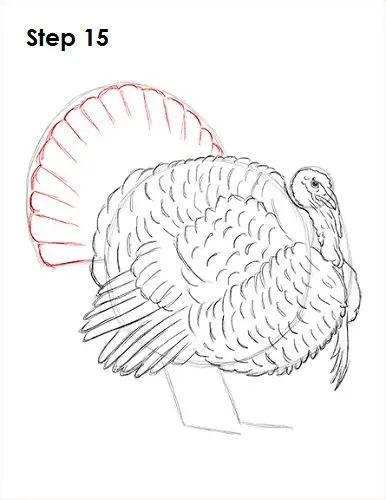
Step 15 (optional): Draw the turkey's tail feathers by using the curved line as a guide. Follow the path of the guide and add short bump-like arcs as you darken the guides. Add some lines inside to create the feathers. Notice how the orientation changes from vertical at the top to horizontal at the bottom.
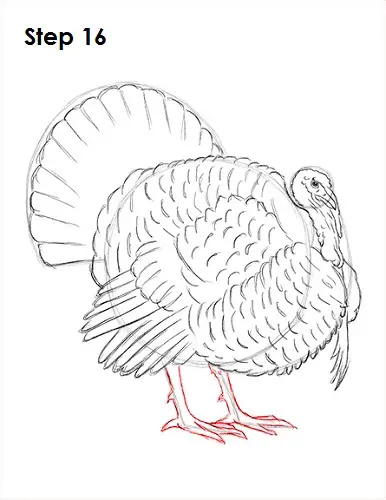
Step 16 (optional): Use the L-shaped lines as guides to draw the turkey's feet. Follow the path of the guide as you darken the lines. Make the leg thick and add the talons at the bottom. Draw the leg on the other side the same way. Don't forget the pointy talons.
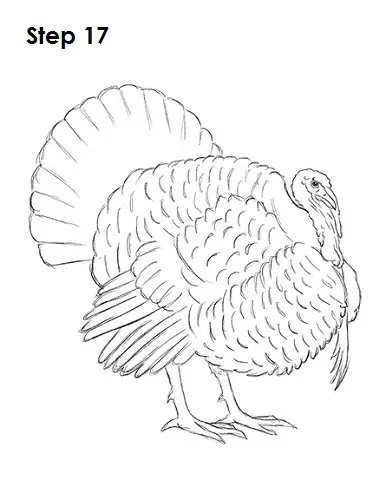
Step 17 (optional): For a cleaner look, erase as much as you can of the initial guide lines. Don't worry about erasing all of the guides. It's okay to leave some behind. Re-draw any of the final sketch lines that you may have accidentally erased.
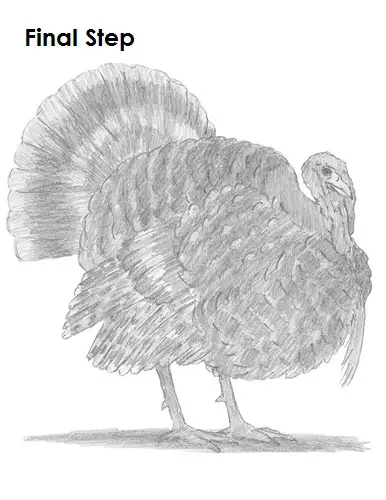
Final Step (optional): Add some shading to your drawing for extra detail. Domestic turkeys have various feather patterns, so shade yours using whichever variety you'd like. Some domestic turkeys are entirely black. You can shade using a darker value all over for an easier drawing. Some domestic turkeys (like the ones the president pardons at Thanksgiving) are entirely white. You can skip the shading for an even easier drawing! Vary the pressure on your pencil to get different degrees of tonal value. Use a lighter value on the tip of each individual curved line inside the body for a puffier texture. Turkey feathers are shiny and iridescent, so use a lighter value on sections of feathers. Try to add the value smoothly and avoid a rough, gritty texture. Shading can be very time-consuming, so be patient and take breaks. It's always a good idea to use reference for a more accurate drawing.
And finally, add a cast shadow underneath. This helps ground the turkey so it doesn't appear to be floating.
Thanks for watching! Subscribe to the
How2DrawAnimals YouTube Channel for a new tutorial every Tuesday.
To learn how to draw popular cartoon characters, visit
EasyDrawingTutorials.com.







