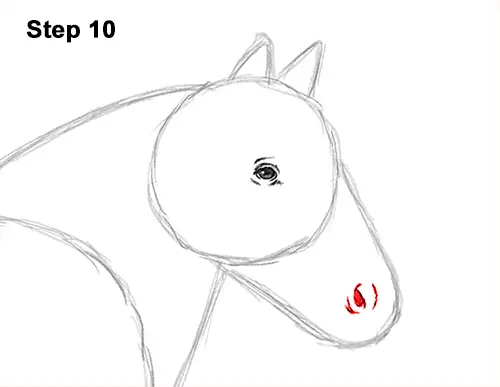
Step 10: Inside the muzzle, near the bottom, draw a small oval for the nostril. When you get the size and position right, darken the lines and shade the inside. Make the ends pointier. Add a few curved lines around the horse's nostril to give it structure.
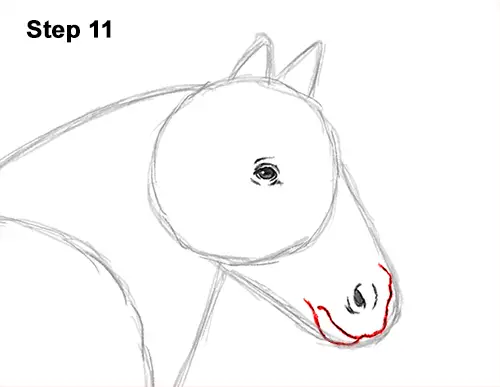
Step 11: Use the initial arc as a guide to draw the rest of the gypsy vanner's muzzle. Draw the muzzle along the path of the guide but make the line a bit wavier as you darken it. At the bottom, curve the line inward toward the top to create the shape of the horse's mouth. To the left of the mouth, draw a curved line along the path of the guide for the chin. The entire shape should fit inside the bottom of the initial arc.
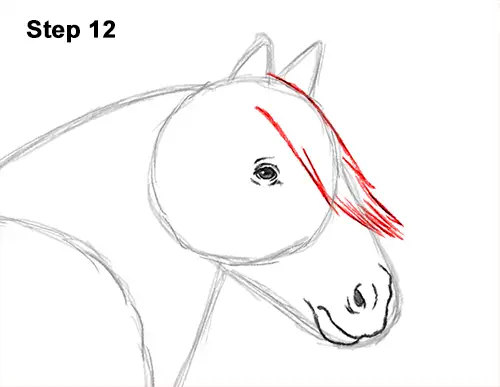
Step 12: At the top of the head, draw a series of sloping lines for the front part of the mane. Use long strokes to the right of the head to create the flowing tips of the mane. The left edge of the mane should be close to the eye, and the slope of the line should be parallel to the side of the gypsy vanner horse's head.
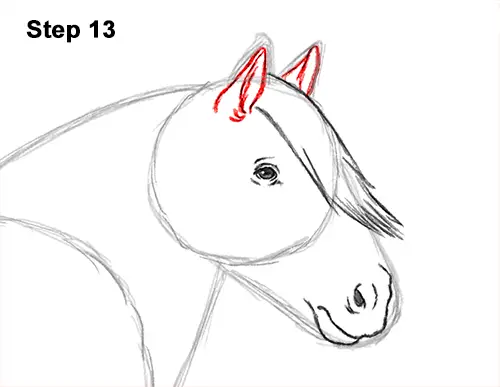
Step 13: Use the M-shaped lines on the head as guides to draw the horse's ears. Darken the shape on the left but make the bottom lines longer so that they come into the head more. Inside the shape, draw a line for the ear's opening. Darken the shape on the right for the other ear. Draw a line inside that shape too.
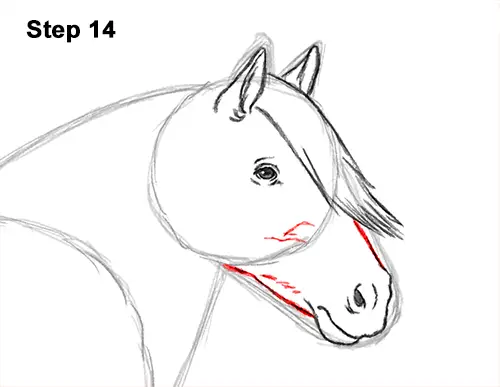
Step 14: Use the remaining arc as a guide to draw the rest of the gypsy vanner horse's head. Follow the path of the arc but make the shape of the head slightly thinner. Add a few lines inside the head for structure and veins.


