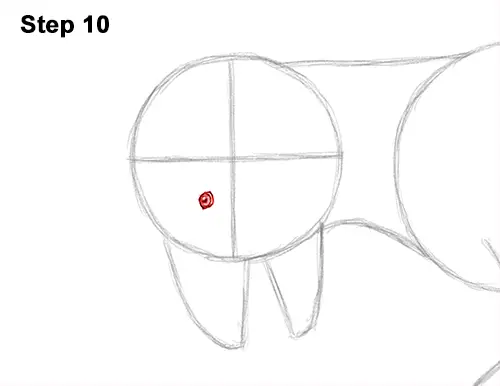
Step 10: Inside the head on the lower, left side, draw a small oval for the pachycephalosaurus's eye. Use the initial lines as guides for the eye's placement. Inside the shape, draw a curved line for the eyeball and a tiny dot for the pupil. Shade the eyeball and use a value that's lighter than the pupil.
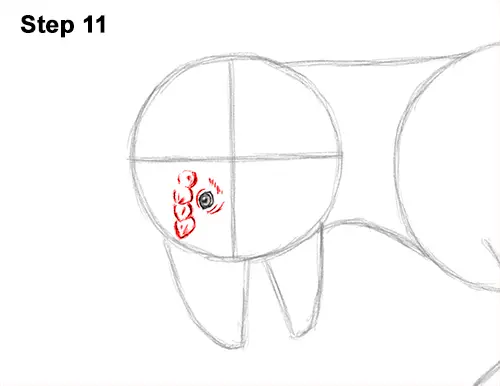
Step 11: Draw a few curved lines around the eye for the skin's wrinkles. Add the thick brow above the eye by first lightly drawing a curved line. Then darken the brow using a series of curved lines along the path of the lightly sketched line. The pachycephalosaurus's brow is spiky, so use semi- circular shapes to emphasize it. Add a few lines within the brow to represent the pointy shapes.
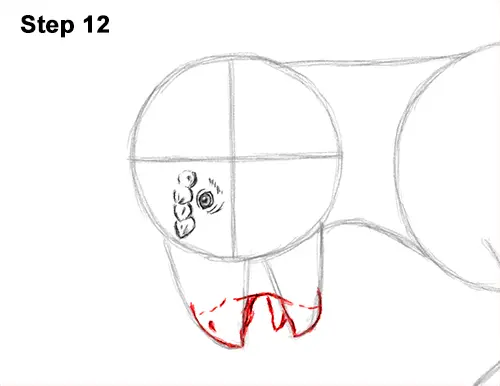
Step 12: Use the small arcs below the head as guides to draw the muzzle. Darken the path of the guides but don't draw all the way to the top. This will make the muzzle shorter. Add curved lines at the top for the skin that's attached to the open mouth. The lower jaw should be smaller. Darken the insides to emphasize the open mouth. Draw a short, curved line in the open mouth for the pachycephalosaurus's tongue.
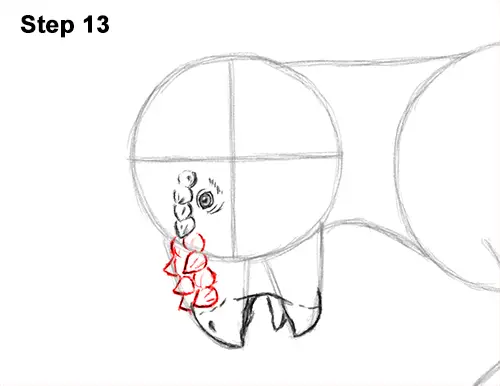
Step 13: Draw a series of spike- like shapes along the top part of the muzzle. The base of these shapes should be round and the top part pointy. Follow the basic path of the guide as you draw the bony shapes of the pachycephalosaurus's muzzle. Stagger the shapes so that they're not too uniform.
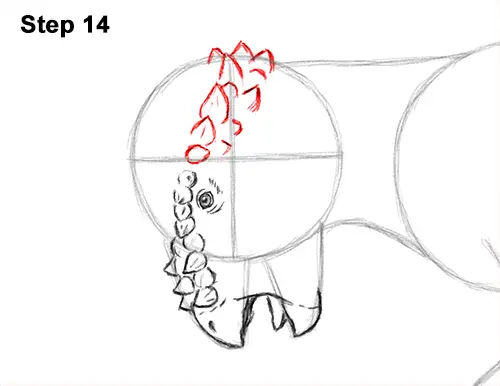
Step 14: Continue drawing a series of spike-like shapes across the dinosaur's head. The shapes are basically short triangles with a round bottom. Use the initial construction lines as guides to place the crown of horns. Make the spiky shapes bigger the farther back on the head they are. Add more spikes on the sides to make more rows. Stagger the shapes so that they're not too neat and orderly.


