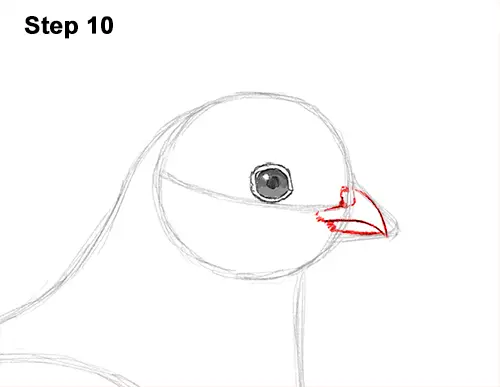
Step 10: Use the angled line on the right side of the head as a guide to draw the quail's beak. Follow the basic path of the guide but make the line curvier to create the top part of the beak. Now draw the beak's opening as a curved line in the middle that stretches inside the bird's head. Follow the bottom part of the guide but make the line curvier to create the bottom part of the beak. Use a series of quick, short strokes on the left side to create the feathery base of the beak.
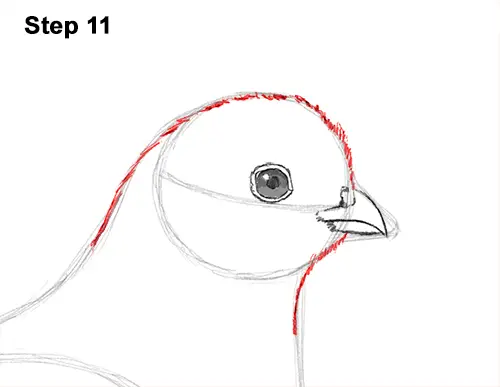
Step 11: Use the intial circle and connecting lines as guides to draw the shape of the head. Use quick, short strokes as you follow the outer edge of the guides to create the shape of the head. Use quick, short strokes under the beak to create the quail's feathery throat.
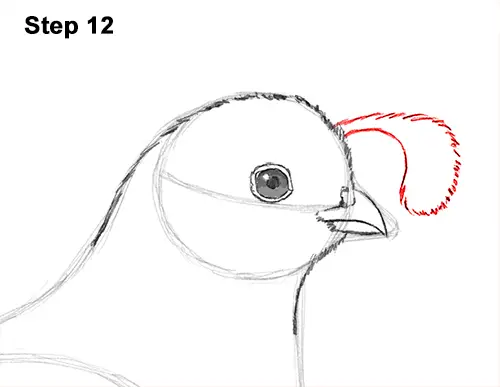
Step 12: Draw the feathers on the quail's head by first lightly drawing a curved line as a path. Follow the path of the line you just created using quick, short strokes to create the texture of the feathers. The crest of feathers, or plume, should droop down and almost touch the top of the beak. The base of the quail's plume should be thin, while the tip should be wide and curvy.
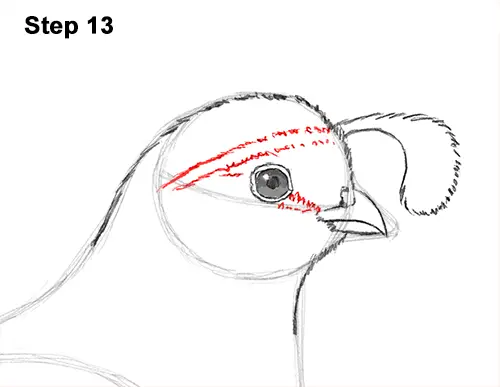
Step 13: Draw the markings on the quail's head using a series of lines made up of quick, short strokes. First draw two curved lines that are made up of quick, short strokes above the eye. Now draw a smaller line between the lower, right side of the bird's eye and the beak.
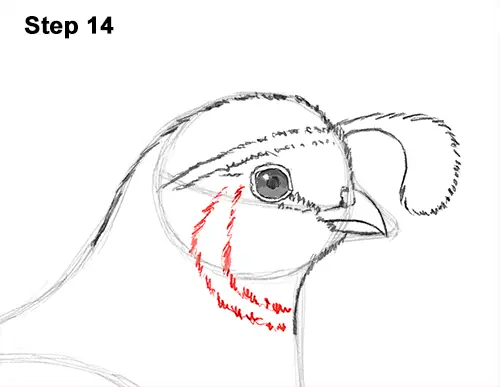
Step 14: Draw another set of curved lines that are made up of quick, short strokes that extend from the throat to the eye.


