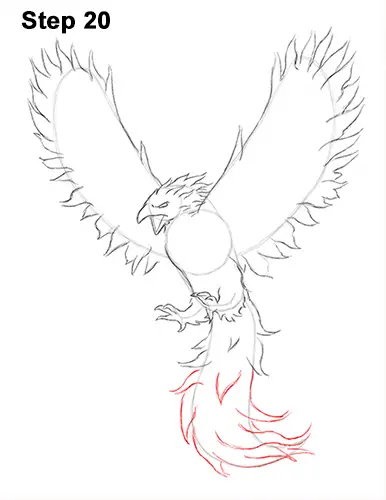
Step 20: Follow the basic path of the guide as you add the flame-like feathers to the rest of the phoenix's tail. Don't dwell too much on making the feathers perfect. Make them different sizes to make them more fire-like.

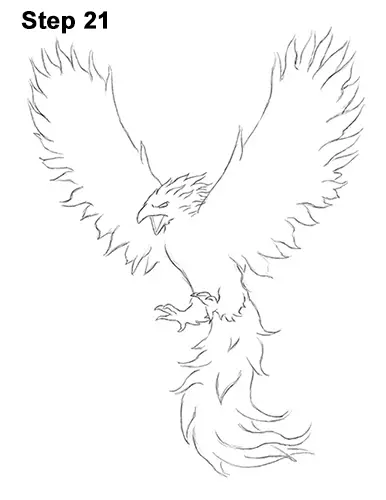
Step 21 (optional): For a cleaner look, erase as much as you can of the initial guide lines. Don't worry about erasing all of the guides. It's okay to leave some behind. Re-draw any final sketch lines you may have accidentally erased. If you're going to color your phoenix, you can also lightly erase some of the final lines so that the graphite doesn't mix with the colors.

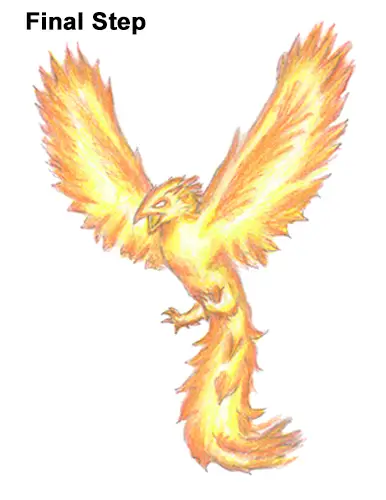
Final Step (optional): The phoenix is a mythical creature that can be colorful, so instead of the usual shading, try coloring your drawing. Start by adding red along the outer edges of the entire body. Add a bit of red inside the body and wings too. This will emphasize their shape more. Since the phoenix is a mythical bird, you can color it any way you want. These steps are more like guidelines than rules.
Now add some red-orange along the edges, making your way in toward the center a bit more. Use some regular orange on top of the previous colors and farther in toward the body. Now use yellow- orange on top of everything and color more of the inside of the body.
Using darker tones on the outside edges and lighter tones inside will give the body a fiery, glowing effect. Use yellow for the inside of the body but leave the middle sections blank. Push harder with the yellow to blend the other colors together. Continue adding the yellow until the colors are well blended.
Coloring can be time-consuming, so be patient and take breaks. Don't forget to pause the "How to Draw a Phoenix" video after each step to draw at your own pace.
Thanks for watching! Subscribe to the How2DrawAnimals YouTube Channel for a new tutorial every Tuesday.
To learn how to draw popular cartoon characters, visit EasyDrawingTutorials.com.


