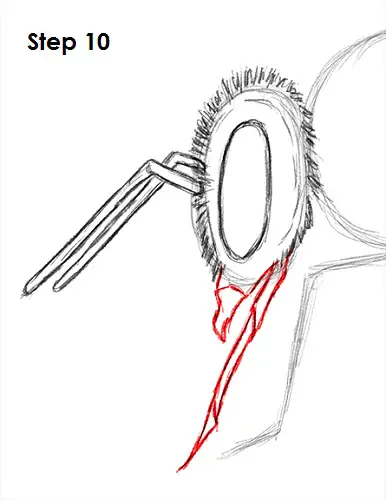
Step 10: Draw a series of lines under the bee's head for the mouth parts. Bee mouths are very complex. This is a simplified version to make drawing the mouth easier. First draw a pointy shape for the mandible and to the right of that, a long thin shape for the tongue. You can divide the tongue or proboscis into three segments for extra detail.
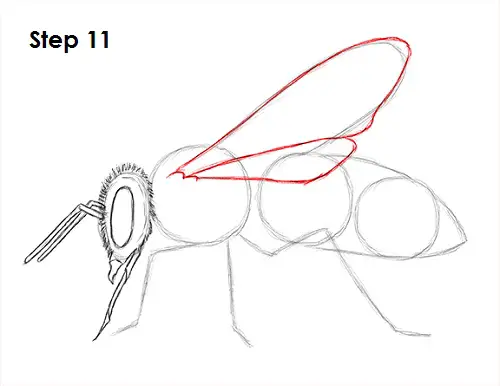
Step 11: Use the initial U-shaped arc as a guide to draw the bee's wings. First draw a wavy line as the base for the wings. Then darken the path of the line and tighten the shape of the forewing. Make the end of the wing pointier. The base of the wing should be thinner and the top wider so it looks like a long triangle. Now draw the wing in the back, or the hind wing, right below the first one. The shape is similar to the forewing but smaller. For the sake of simplicity the bee's wing on the other side was omitted, but you can draw it peeking from behind if you'd like.
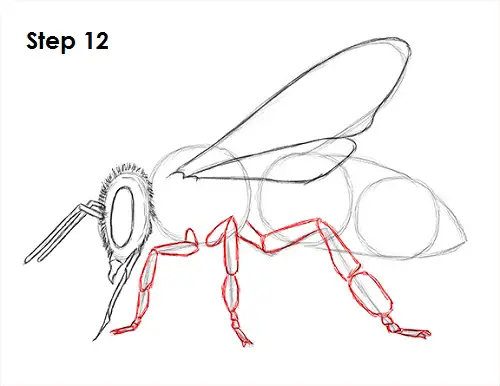
Step 12: Now draw the bee's legs by using the angled lines as guides. Follow the path of the line as you make the first leg thicker. Draw lines at the joints to divide the leg into segments. Notice how the segments of the legs are not one thickness throughout but vary in girth from one end to the other. Draw two tiny claws at the end of the bee's foot. Use the line in the middle to draw the middle leg. Add an extra segment at the top that angles to the left and connects to the thorax. Continue drawing the legs in segments and add the two little claws at the end of the foot. Use the final angled line as a guide to draw the hind leg. The bee's hind leg is the biggest, so draw the segments thicker. Remember to make each individual segment vary in thickness. Draw the thin foot at the end with tiny claws.
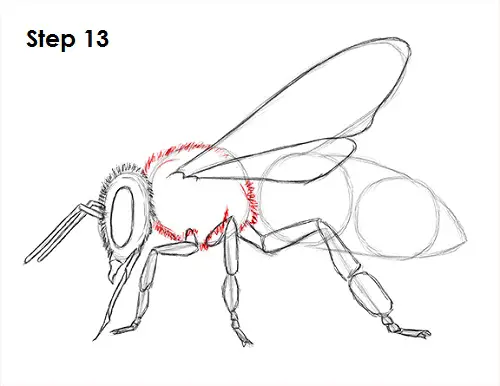
Step 13: Draw the bee's fuzzy thorax by using the initial circle as a guide. Just follow the path of the circle using thick, short strokes to create the tiny hairs.
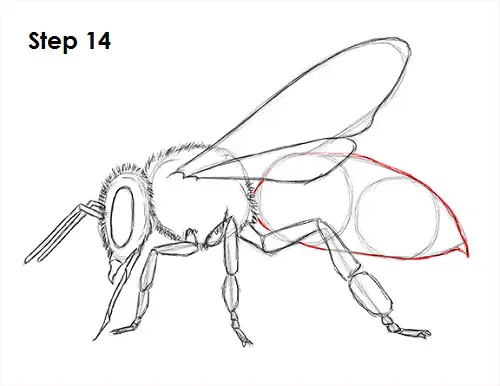
Step 14: Use the initial circles and lines as guides to create the bee's abdomen. Have the end of the abdomen come to a point for the stinger.


