Page 3 of 4
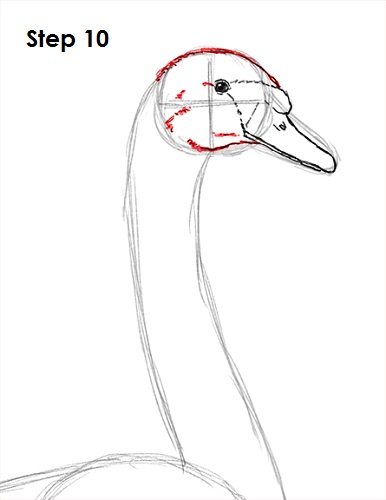
Step 10: Darken the outer portion of the circle to form the swan's head. Draw a few quick, short strokes inside the head for extra detail.
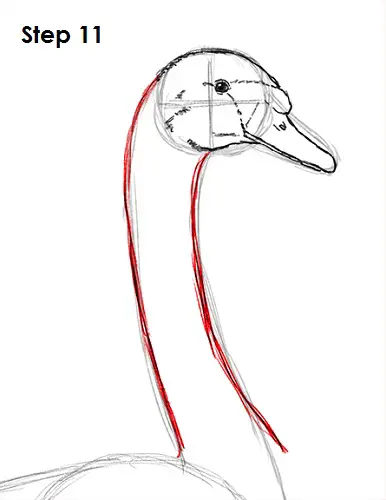
Step 11: Darken the lines under the head to form the swan's long neck. Curve th eneck more and make it thinner. The lower part of the line on the right should stick out just a bit.
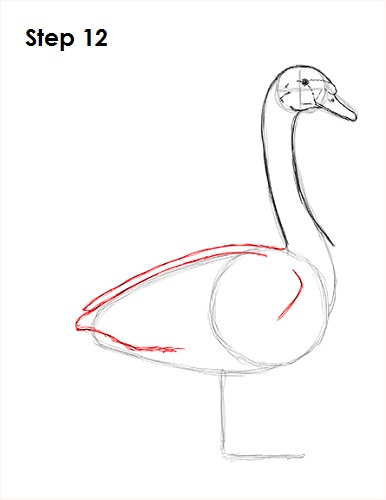
Step 12: Use the top half of the body as a guide to draw the swan's folded wing. The wing comes to a curved point on the left side of the body. Add a small curved line on the left too. Draw another long, curved line just above to represent the wing on the other side.
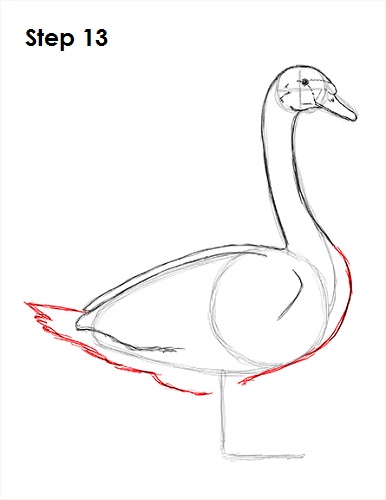
Step 13: Use the initial shape as a guide to draw the rest of the swan's body. Draw a few spikes on the left side between the wings using quick, short strokes for the tail. If you want to draw your swan in water, stop here and add a long line across the body to represent water. Otherwise finish the bottom part of the swan's body using the initial shape as a guide. Draw a small bump on the bottom for the belly. Notice that the lines don't touch the guide for the swan's feet.
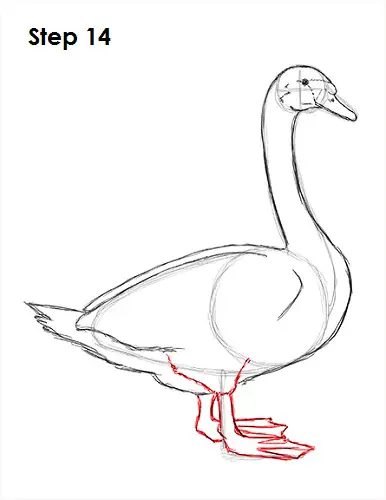
Step 14: Use the L-shaped line as a guide to draw the swan's feet. First draw th ebase of the foot between the wing and the L-shaped line. Now draw the rest of the foot by making the guide line thicker. Swans have flat webbed feet, so first draw three individual toes, then draw the webbing in between using curved lines. Draw the visible portion of the leg on the other side the same way.


