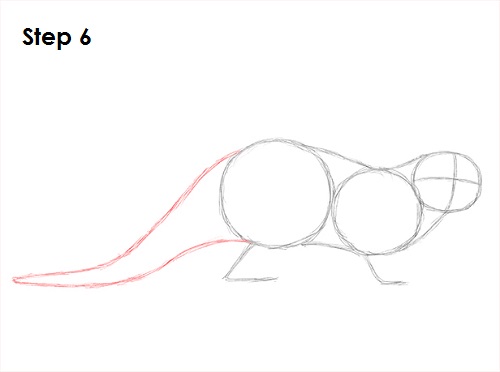
Step 6: Draw two curved lines that come to a point on the left side of the body as a guide for the otter's tail. Draw a long tail for a river otter and a shorter tail for a sea otter.
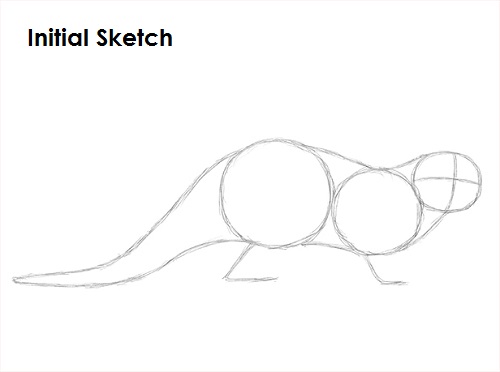
That's it for the initial sketch! From this point on, press harder with your pencil to get a more defined sketch.
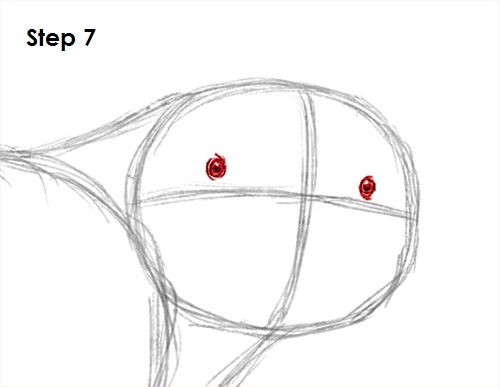
Step 7: Draw the otter's eyes inside the head using the lines as guides for placement. Otters have very small eyes, so draw them as tiny circles. Shade in the inside of the eyes except for a small circle to represent glare. Add a few lines around the eyes as extra detail.
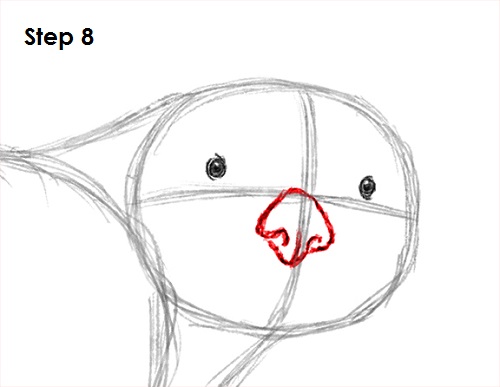
Step 8: Draw the otter's nose using the lines as guides for placement. First lightly draw a diamond. Then darken the outline and give it a rounder shape. Add a couple of arcs on the sides for the otter's nostrils and a line that splits the bottom of the nose.
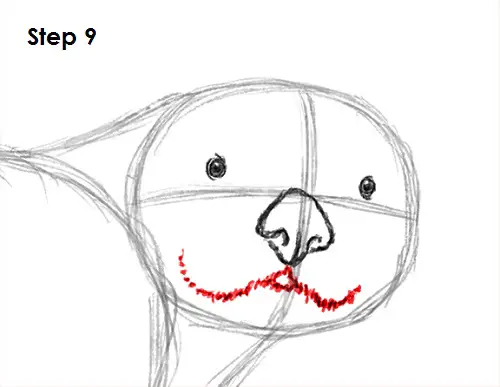
Step 9: Draw the otter's mouth under the nose using quick, short strokes to represent fur. The mouth starts out as a short line under the nose, then it splits into two and curves up.


