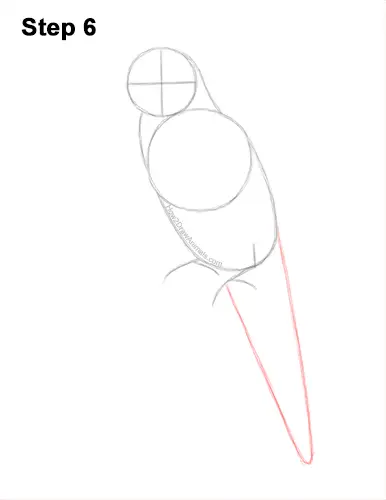
Step 6: Below the body, draw two long lines that meet at the bottom as a guide for the rainbow lorikeet's tail. The guide for the tail should be wide at the top and gradually get thinner at the bottom.
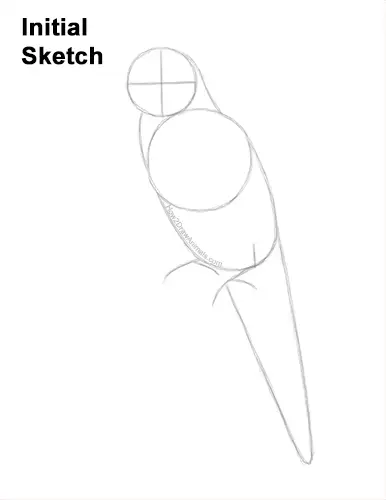
That's it for the guides! From this point on, press harder with your pencil for a more defined drawing.
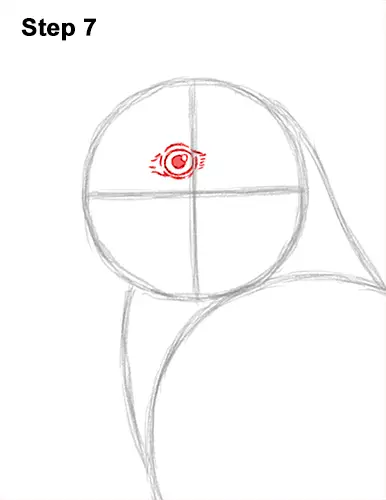
Step 7: Use the initial lines as guides to place a small circle inside the head for the rainbow lorikeet's eye. Inside the circle, off to the side, draw a tiny circle for highlight. In the middle, draw a big dot for the pupil. Draw short, curved lines above and below the eye for the eyelids. Draw a few more short lines on the sides of the eyes for the creases on this Australian parrot's exposed skin.
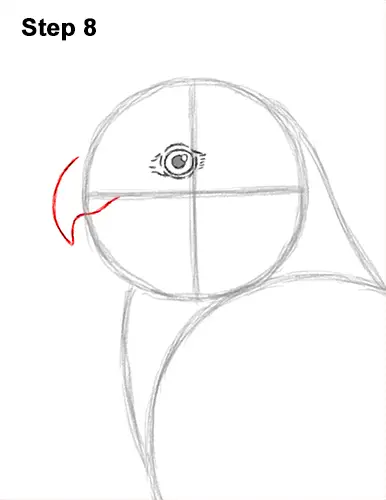
Step 8: On the left side of the circle, lightly sketch a short, curved line for the first part of the lorikeet's beak. Keep this line close to the head. When you get the placement and size right, darken it. Draw a second line that curves up toward the guide line inside the head for the bottom of the bird's beak.
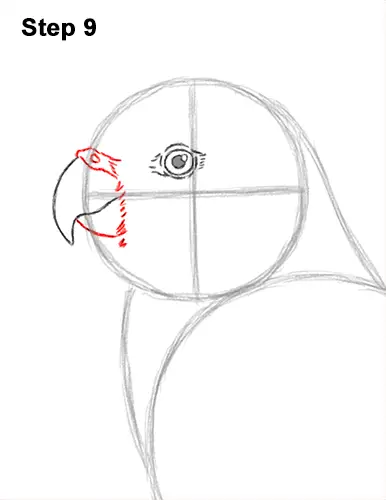
Step 9: Above the beak, draw a short, curved line for the structure called the cere. Within the shape of the cere, draw a tiny circle for the lorikeet's nostril. Below the top beak, draw a short line that curves to the right for the bottom half of the bird's beak. Sketch lightly at first and then darken the line. Draw a series of short strokes along the right side for the feathery base.


