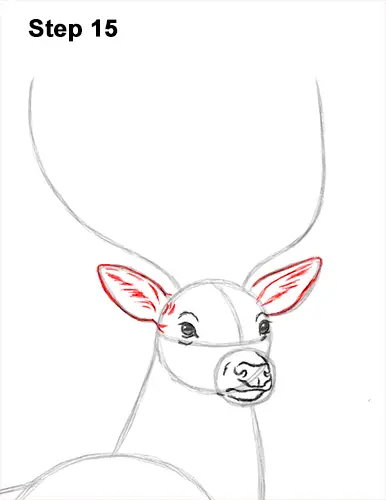
Step 15: Darken the arcs on the deer's head to create the ears. Make the base of the ear on the left longer so that the lines go into the head more. Draw a series of short strokes within the shapes for the fur found inside the ears.
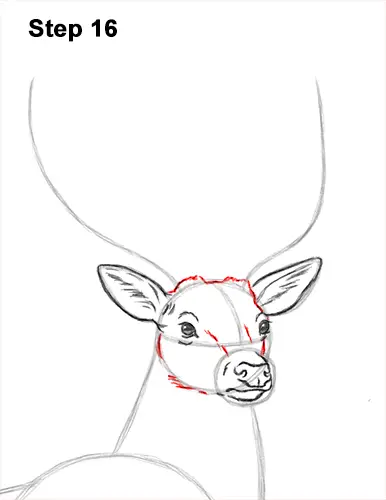
Step 16: Use the bigger circle as a guide to draw the rest of the deer's head. Darken the top edge of the circle but add bumps where the antler guides are. Follow the path of the circle on the right side but make the shape of the head a bit narrower. Add a few lines along the circle's edge on the left side for the deer's jaw.
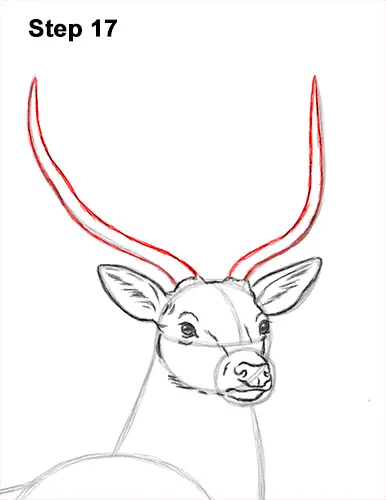
Step 17: Use the long lines on top of the head as guides to draw the deer's antlers. Follow the guide and darken the lines. Make the shape thick at the bottom and gradually narrower at the top. Don't make the overall shape too thick, otherwise they'll start to look like moose antlers. Draw the antler on the right the same way. Darken the guide and make the shape thicker. Make the bottom part wide. Then gradually make the shape thinner until you end at a pointy tip.
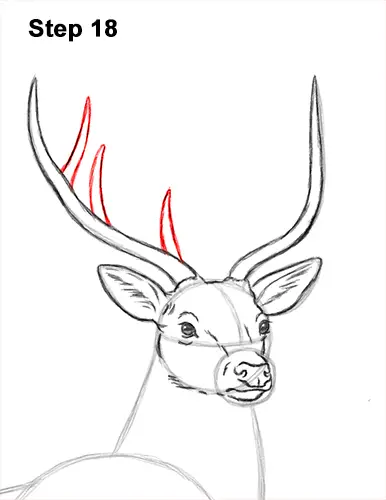
Step 18: Draw three thin, short, pointy shapes along the antler on the left for the branches. Separate the branches apart so that one is near the top, one is in the middle and one is near the bottom. Different species of deer have different antlers, so you can add more branches or branches on the branches if you'd like.
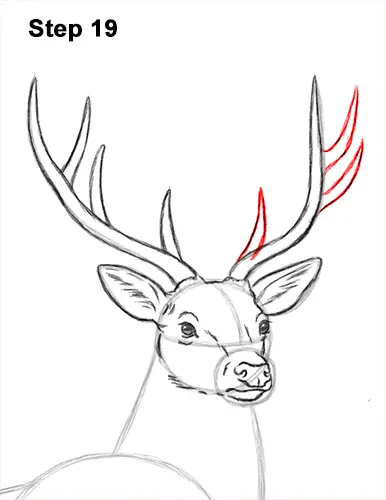
Step 19: Draw three branches on the antler on the right as well. Separate the branches so that they are equally spread along the deer's main antler. For this antler, the top branches are on the right side and the bottom branch is on the left.


