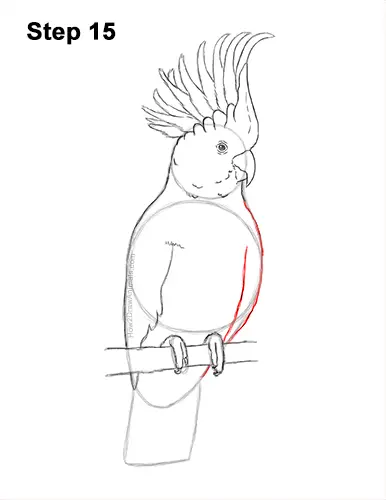
Step 15: Darken the outer edges of the guides on the right side for the other side of the bird's body. Draw a wavy line along the inner, right edge of the body for the visible part of the cockatoo's other folded wing.
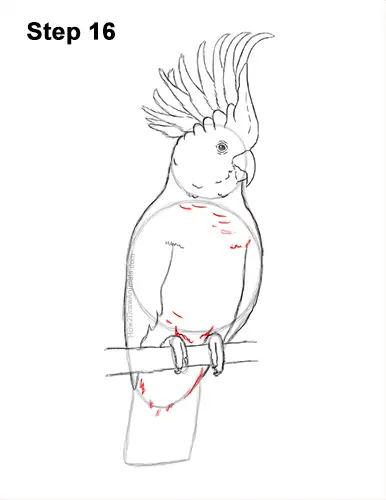
Step 16: Draw a series of short, curved lines along the top part of the body for detail on the feathers. Draw a series of short strokes along the arc at the bottom to finish the shape of the cockatoo's body.
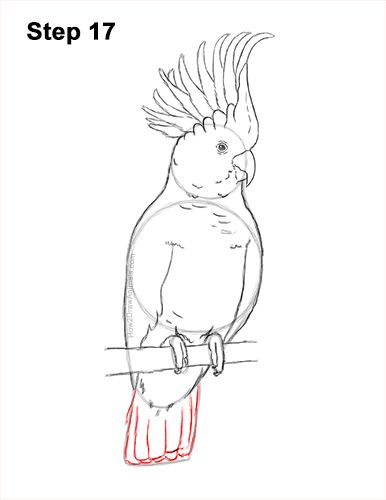
Step 17: Darken the square-like shape at the bottom for the cockatoo's tail but make it rounder. Draw a series of long, vertical lines inside the shape for the feathers that make up the bird's tail.
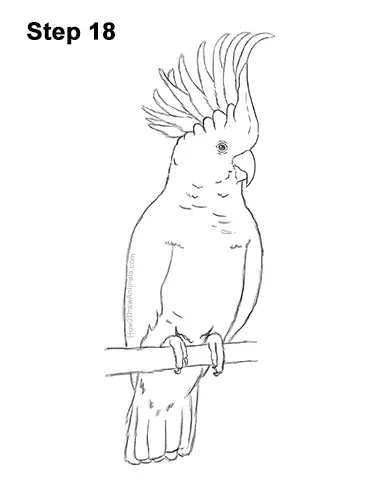
Step 18: Go over the final sketch lines with a pen, marker or any other type of permanent ink. Take your time and be careful when you ink to avoid any accidents. After the ink dries, get rid of every pencil mark with an eraser for a cleaner drawing.
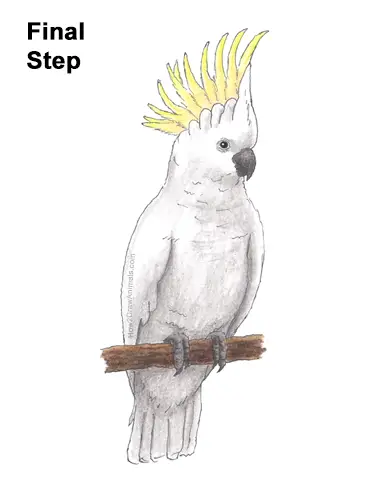
Final Step: Color your cockatoo drawing! Use different shades of yellow for the bird's crest. Use a mixture of light yellow, yellow-orange and even a bit of light brown along the base of the crest. Use dark gray for the beak and the stripes. Color a section on the bird's beak lightly for highlight. Color the feet lightly and add some lines inside for creases and wrinkles.
Add a bit of light gray all over the cockatoo's body for shadows. This will give the figure more volume and dimension. Add the color lightly at first and slowly build up to the level of darkness that you like. Use darker gray along the edges for deeper shadows. Use a mixture of light and dark brown to turn the bird's perch into a branch. Don't forget to pause the video after each step to draw at your own pace.
Thanks for visiting! Subscribe to the How2DrawAnimals YouTube Channel for a new tutorial every week.
To learn how to draw popular cartoon characters, visit EasyDrawingTutorials.com.
RELATED TUTORIALS
 |
 |
 |


