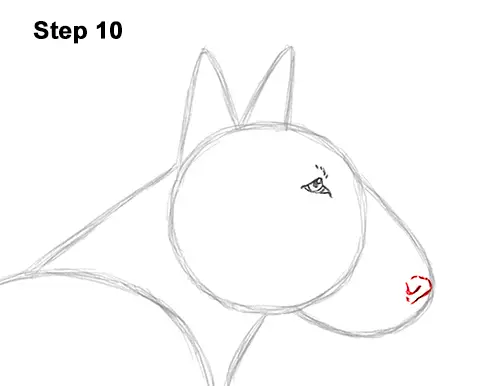
Step 10: On the left side of the arc, near the edge, draw a small, angled line for the tip of the nose. Pay attention to the placement of the bull terrier's nose. To the left, draw a smaller line for the nostril. Add a curved line at the top and a couple of short lines at the bottom to complete the shape of the dog's nose.
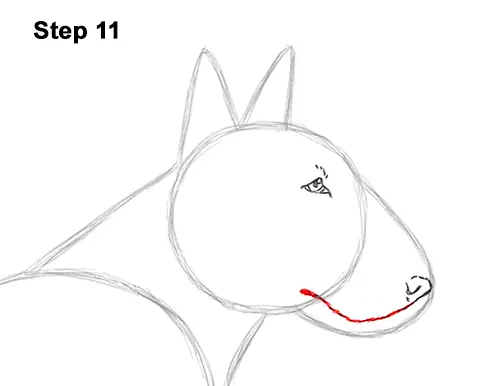
Step 11: Under the nose, draw a line that slopes down to the left, then angles up and to the left for the mouth. Follow the basic curvature of the initial arc. Make the left side of the bull terrier's mouth thick and dark.
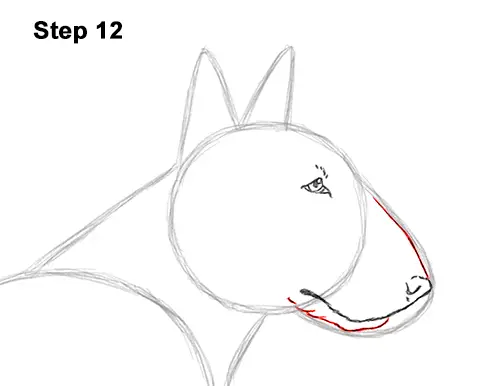
Step 12: Below the dog's mouth, draw a curved line along the path of the initial arc for the lower jaw. Draw the jaw a bit higher than the initial arc. Darken the top of the arc to complete the muzzle. Follow the path of the arc. The bridge of the bull terrier's nose should slope downward.
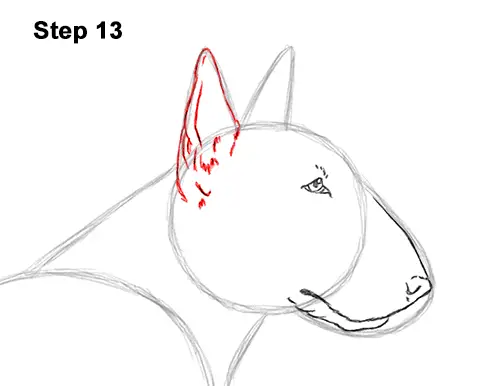
Step 13: Use the triangular shape on the left as a guide to draw the bull terrier's first ear. Darken the initial line but extend the bottom farther down toward the dog's head. Inside the shape, on the left, draw a couple of lines for structure. At the bottom, draw a series of short lines for more structure and fur.
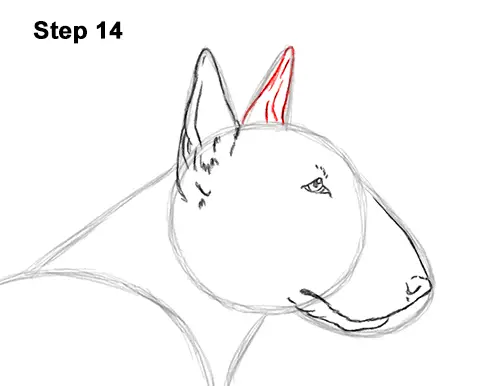
Step 14: Darken the guide on the right for the other ear but make the shape wavier. Inside the shape, draw a series of lines to give the ear more structure.


