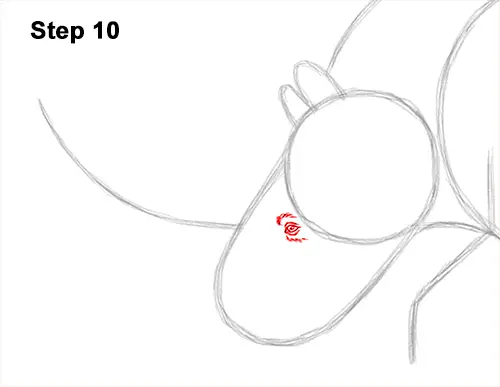
Step 10: Inside the muzzle, close to the edge of the initial circle, draw a tiny circle for the woolly rhinoceros' eye. When you get the size and position of the eye right, darken the shape but make the sides pointier. Inside the eye, draw a tiny dot for the pupil. Notice how small the eye is in relation to the rest of the head. Draw a couple of short, curved lines around the eye for wrinkles. Add a few short strokes above and below the eye to represent fur.
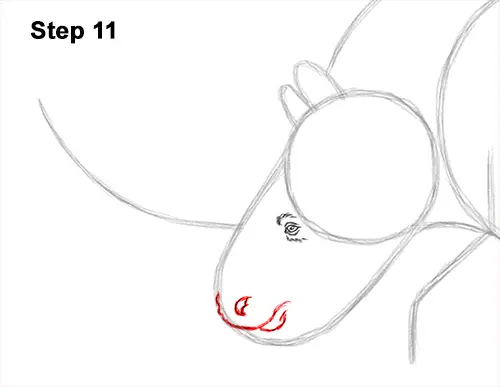
Step 11: Near the bottom of the initial arc, draw a small, oval-like shape for the nostril. Below the nostril, draw a short, curved line for the woolly rhinoceros' mouth. Darken a small section of the initial arc for the front of the muzzle. The mouth should curve up toward the eye. Under the mouth, draw a short, curved line for the lower lip.
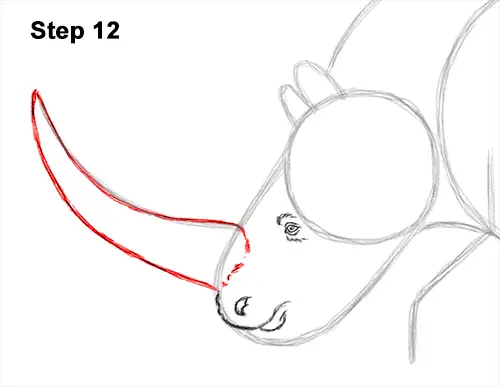
Step 12: Use the long line on the muzzle as a guide to draw the horn. Draw a broken line at the bottom for the base. Add another curved line on the left to make the horn thicker. Keep the tip pointy. Darken the initial guide line. Woolly rhinos' horns were very long.
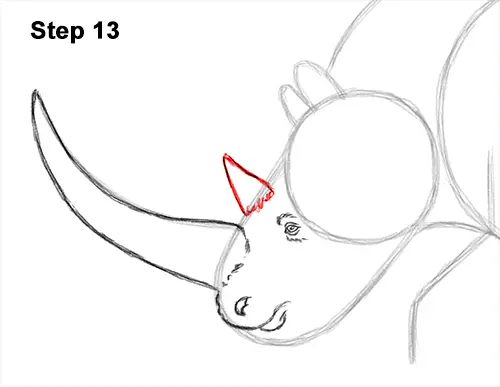
Step 13: Above the eye, draw a small, triangular shape for the woolly rhinoceros' second horn.
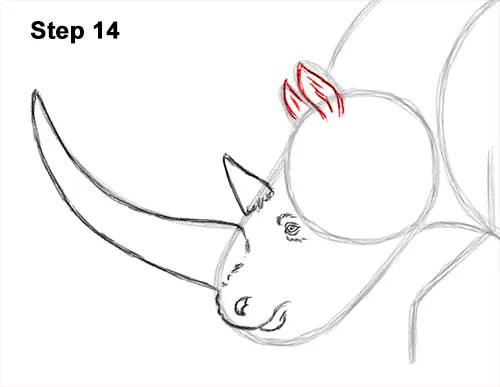
Step 14: Darken the arcs on the head to create the ears but make the tops a bit pointier. Inside the shapes, draw a series of short strokes for the fur found in there.


