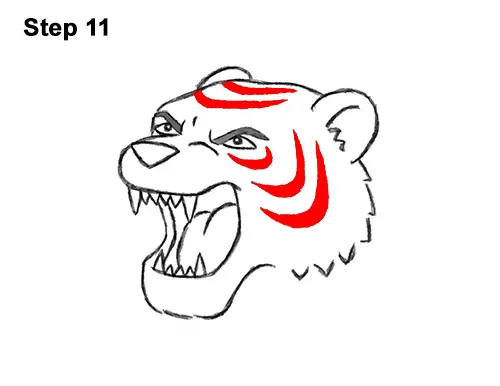
Step 11: Tigers have stripes! Add a series of thick, pointy lines inside the head. Draw a couple of stripes above the eyes. The stripes are basically thick lines with pointy ends. Don't push down too hard on your pencil when you shade the tiger's stripes. Add a curved stripe below the eye. Below that, draw another curved stripe but make it longer and thicker. At the bottom, draw an even bigger curved stripe. You can draw more stripes if you'd like.
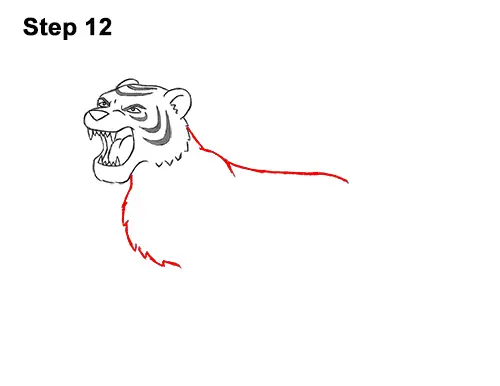
Step 12: Draw a curved line to the right of the head for the shoulder. Extend the line to the right side to create the top part of the tiger's body. Curve the end of the line down a bit. Under the head, draw another curved line for the chest. This line should curve down and then to the right. Break up the line to indicate fur.
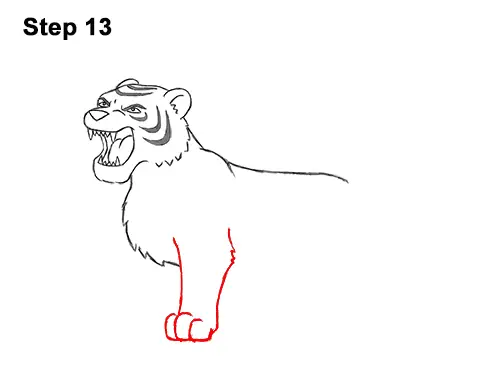
Step 13: To the right of the chest, draw a vertical line for the first part of the front leg. To the right, draw another vertical line for the other side of the front leg. Bend this line a bit for the joints. At the bottom, add the tiger's foot by drawing a curved line that points to the left. Inside the foot, draw a couple of short, curved lines to split the individual toes.
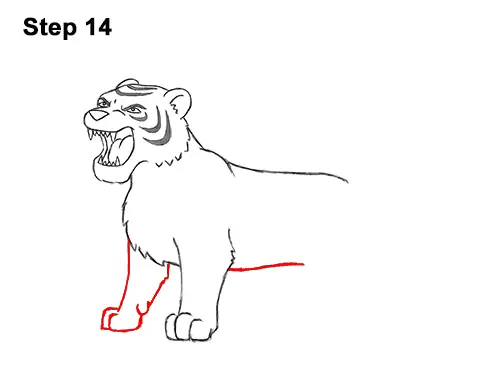
Step 14: On the left side, draw the tiger's other front foot the same way. Start with two vertical lines for the leg and add a curved line at the bottom for the foot. Inside the foot, draw a curved line for the toes. Add another curved line on the right for the dewclaw. To the right of the first front leg, draw a horizontal line for the underside of the tiger's body.
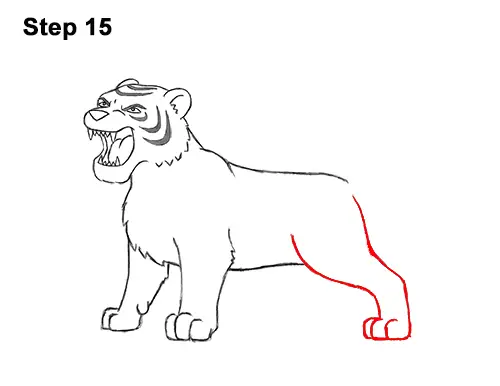
Step 15: To the right, draw a long, wavy line for the first part of the hind leg. This line should curve down, then slope to the right, then curve down again. Add a similar line on the right side to complete the shape of the tiger's leg. At the bottom, draw the foot using a couple of curved lines, just like with the front feet. Inside the foot, draw a couple of short, curved lines to separate the toes.


