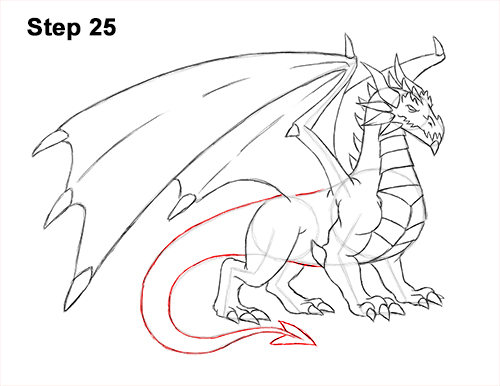
Step 25: Darken the curved lines on the left side to create the shape of the tail. At the tip of the ice dragon's tail, draw a couple of small, triangular shapes for an arrow-like spike.
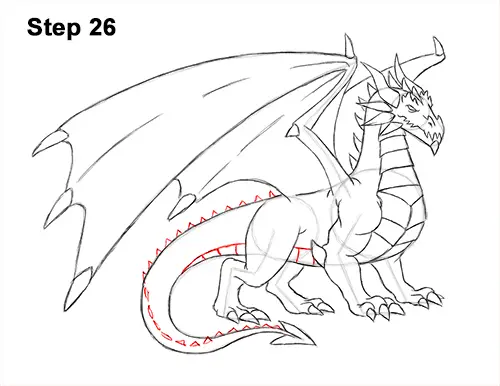
Step 26: Draw a series of small, triangular shapes along the top of the body for the spikes on the back. As you get to the curved section of the dragon's tail, start placing the spikes inside and making them thinner. As you get closer to the tip of the tail, place the spikes back at the top and make them bigger. Using a series of short lines, draw the remaining scales along the underside of the ice dragon's body.
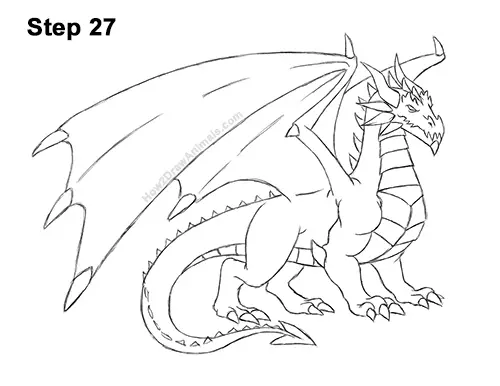
Step 27: Go over the final sketch lines with a pen, marker or any other type of permanent ink. Take your time and be careful when you ink to avoid any accidents. After inking, get rid of every pencil mark with an eraser for a cleaner drawing.
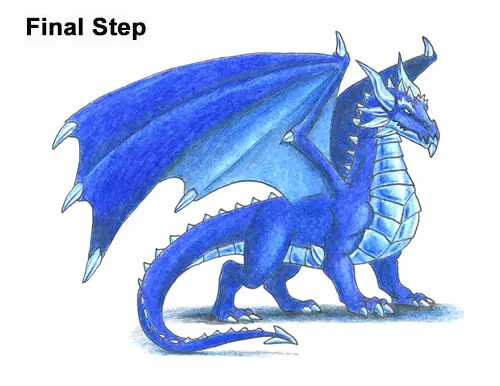
Final Step: Color your ice dragon drawing! Use blue as the base for the dragon's body. Color lightly at first. Gradually make your color darker by pushing harder on your pencil. If you don't want an ice dragon, you can color your drawing any other color! Use a bit of dark blue throughout the body to create some shadows and give the figure more volume. Now use light blue for the plate armor at the bottom and the inner wing. Using dark blue, draw a few lines along the side of the dragon's armor to make it reflective. Use mainly light blue with a bit of dark blue for the remaining spikes and horns. Use lines and streaks inside the shapes to give them an icicle- like appearance.
Draw a shadow at the bottom using gray and blue so that the dragon doesn't appear to be floating. Don't forget to pause the video to draw at your own pace.
Thanks for visiting! Subscribe to the How2DrawAnimals YouTube Channel for a new tutorial every week.
To learn how to draw popular cartoon characters, visit EasyDrawingTutorials.com.
RELATED TUTORIALS
 |
 |
 |


