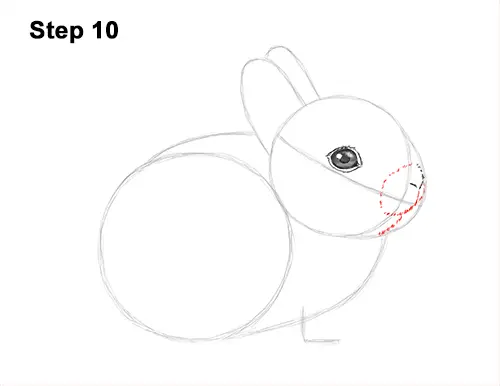
Step 10: Under the nose, draw a line that curves to the left for the first part of the mouth. Below that, draw another line that curves to the left for the chin. Use a series of tiny, short strokes to draw these lines for a fur-like texture. Draw a circular shape that's made up of short strokes from the mouth to the nose for the rest of the baby bunny's muzzle. Under the nose, on the right, draw another curved line for the other side of the mouth.
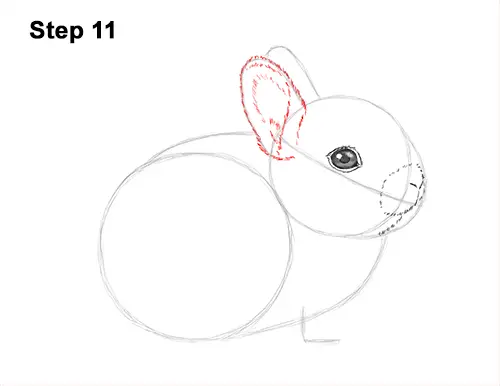
Step 11: Use the tall arc on the top, left side of the head as a guide to draw the baby bunny's first ear. Use short strokes as you darken the path of the arc for a fur-like texture. Extend the lines for the bottom part of the ear in toward the head. Inside the ear, add more short strokes as the furry edge of the ear's opening. These strokes should follow the basic path of the ear too, but the shape should be pointy at the bottom.
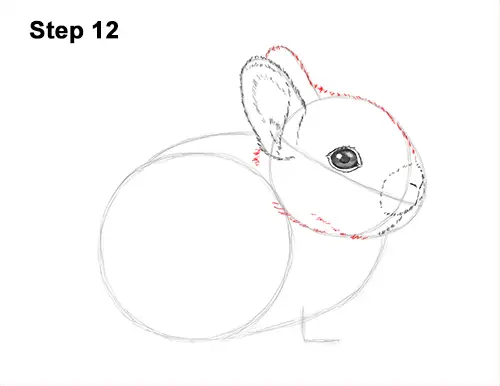
Step 12: Use the curved line next to the ear and the initial circle as guides to finish drawing the head. Draw short strokes along the path of the guide to create the other ear. Follow the basic path of the initial circle and draw a series of short strokes along the edge. Connect the line for the top of the head to the muzzle to make the shape of the head a bit longer. Add some strokes along the bottom edge of the circle too. Don't close off the shape at the bottom to convey where the head connects to the body.
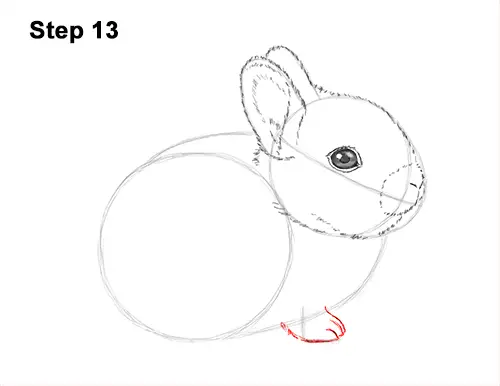
Step 13: Use the angled line under the body as a guide to draw the foot. Follow the basic path of the guide and draw the thick shape of the baby bunny's foot around it. Draw a couple of short, curved lines at the tip of the foot to separate the toes.
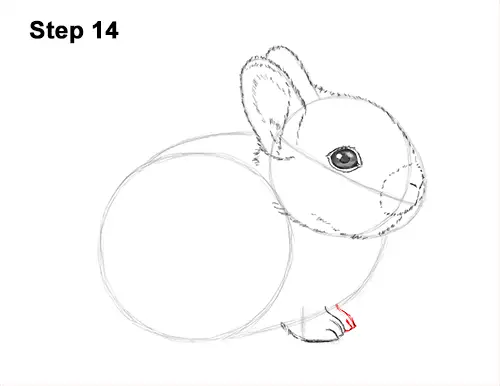
Step 14: Use the first foot as a template to draw the other front foot on the right side. Only the front part of the bunny's foot will be visible. Don't forget to add the toes at the tip.


