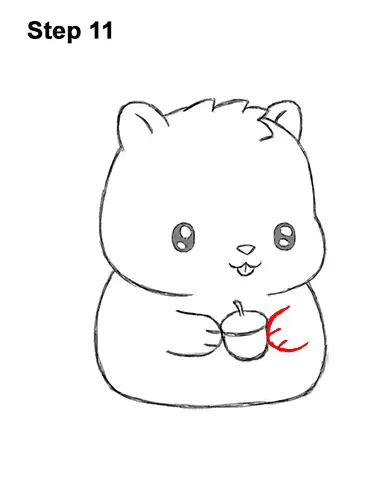
Step 11: To the right of the acorn, draw another curved line for the chipmunk's other hand. Add the fingers inside.
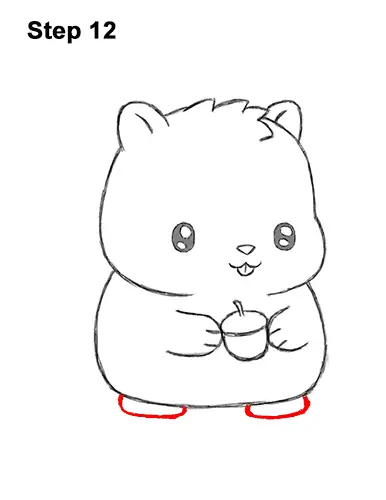
Step 12: Under the body, draw a couple of wide, curved lines for the feet. Make the chipmunk's feet wide and flat. Don't set them too close to each other.
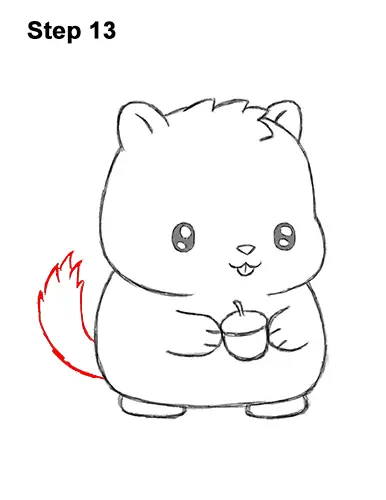
Step 13: To the left of the body, draw the chipmunk's tail using a series of curved lines. The tail is basically made up of two long, curved, vertical lines with a few short spikes at the top.
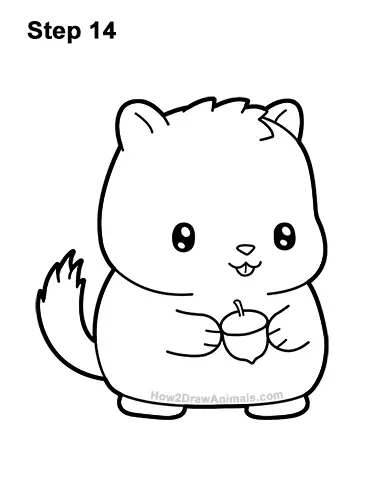
Step 14: Using a pen or marker, carefully go over the lines to make your chipmunk drawing permanent. After inking, get rid of every pencil mark with an eraser.

Final Step: Color your chipmunk drawing using color pencils, markers or crayons! Use dark brown to create some stripes. Use brown for the rest of the body except for the lower half of the head and belly. Use yellow for the lower half of the face, the belly and the hands and feet. Color the acorn dark brown at the top and light brown at the bottom. Use pink for the ears and nose. Add a bit of dark brown to the chipmunk's head for extra detail. Don't forget to pause the video to draw at your own pace.
Thanks for visiting! Subscribe to the How2DrawAnimals YouTube Channel for a new tutorial every week.
To learn how to draw popular cartoon characters, visit EasyDrawingTutorials.com.
RELATED TUTORIALS
 |
 |
 |


