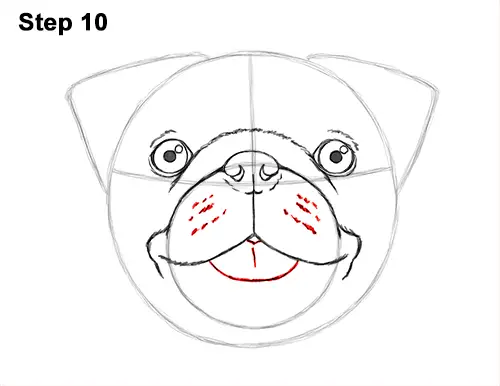
Step 10: Add the pug's tongue by first drawing a tiny V-shaped line under the mouth. Now draw a longer U-shaped line below for the front edge of the tongue. Sketch lightly at first to get the shape right. Add a few lines inside the tongue. Add a series of dots and dashes on the muzzle for extra detail.
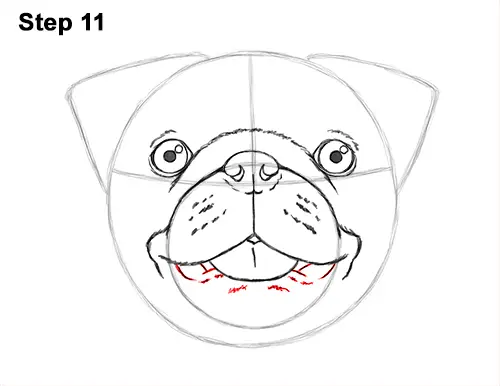
Step 11: Add the lower lip under the pug's tongue using a series of curved lines. The front part of the lip is hidden behind the tongue, so just draw the visible part on the sides.
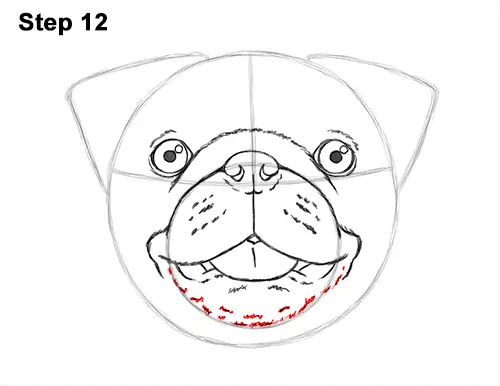
Step 12: Use the initial circle as a guide to draw the pug's chin below the tongue. Draw a series of broken lines along the path of the guide to create the shape of the chin. Use quick, short strokes as you draw the chin for a furry texture.
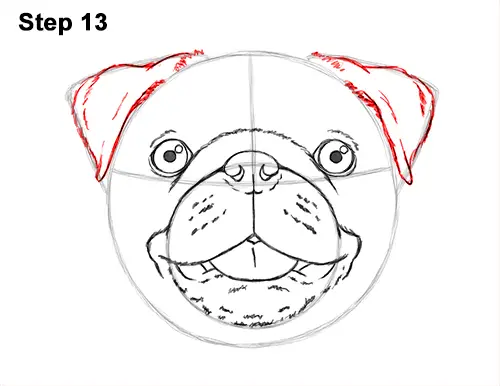
Step 13: Use the angled lines on the head as guides to draw the pug's ears. Darken the path of the guide using curved lines and short strokes. Make the overall shape of the ear more round and less angled. Use the angled line on the right as a guide to draw the other ear the same way. The dog's two ears don't have to look exactly the same , but they should be somewhat symmetrical.
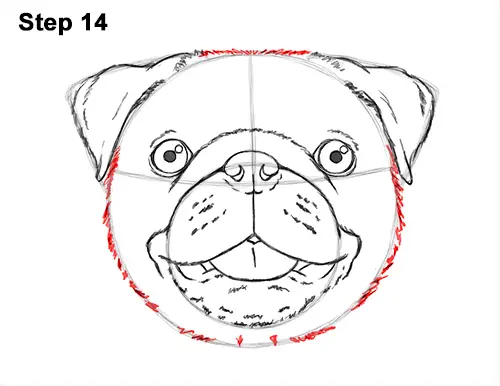
Step 14: Use the main circle as a guide to draw the rest of the pug's head. Follow the basic path of the circle as you create the shape of the head. Use a series of quick, short strokes as you draw the head for a fur-like texture. The lines at the bottom should be more broken up to indicate where the head connects to the body.


