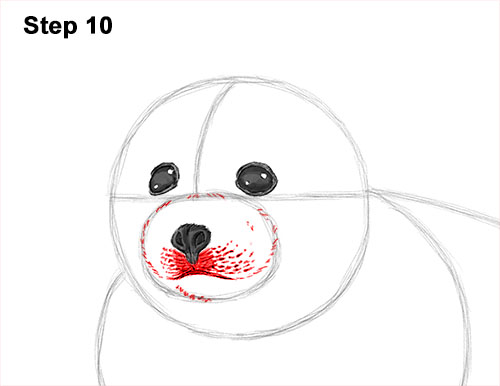
Step 10: Draw a long horizontal line under the nose for the harp seal pup's mouth. Make the line thicker and darker and curve the ends up a bit. Add some value to the section where the nose meets the mouth. Use the initial oval shape as a guide to draw the rest of the muzzle. Darken the basic path of the oval using short strokes for a fur-like texture. Add a short, curved line at the bottom using more short strokes for the chin. Add some squiggly lines on the sides of the muzzle for extra detail and whiskers too if you'd like.
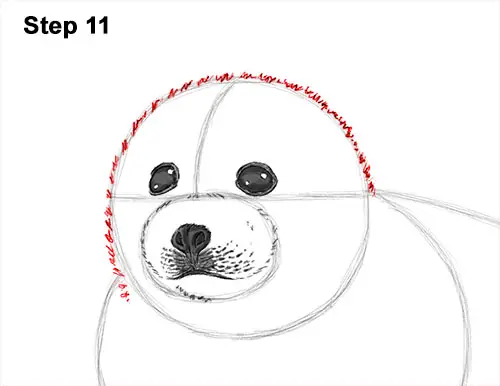
Step 11: Use the main circle as a guide to draw the rest of the harp seal's head. Draw a series of short strokes along the edge of the circle for a fur-like texture. Make each stroke short, otherwise the fur will be too long. Don't add fur to the lower, right side of the head because that's where it connects to the body.
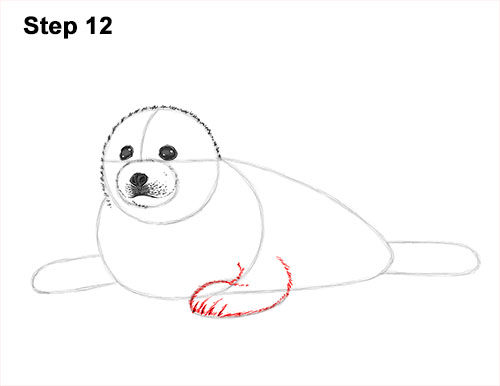
Step 12: Use the small arc at the bottom as a guide to draw the seal pup's front flipper. Use short strokes along the path of the arc to create a fur-like texture. Extend the tips of the shape upward to make the top part of the flipper longer. Add a few more lines at the front of the flipper to separate the individual toes. Add a short, thick line at the tip of each toe for a hint of a claw.
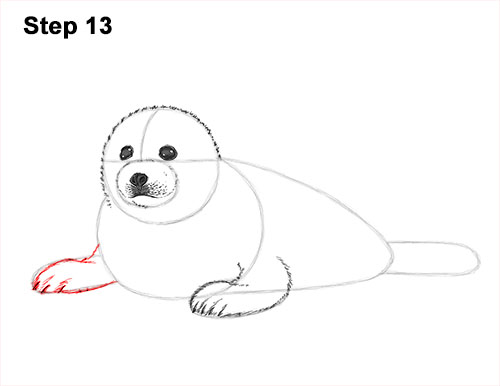
Step 13: Use the small arc on the left side as a guide to draw the other front flipper the same way. Use short strokes along the path of the guide to create the harp seal pup's furry flipper. Don't forget to add a few short lines at the front for the digits!
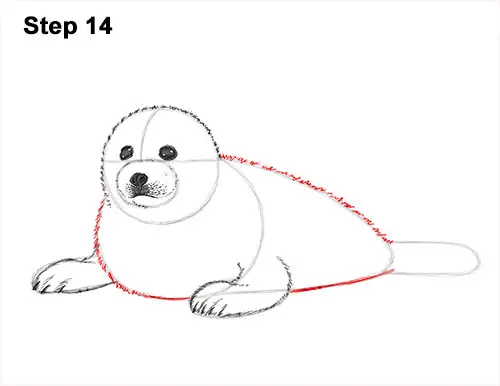
Step 14: Use the bigger shapes as guides to draw the rest of the seal's body. Use quick, short strokes along the outer edge of the guides to create the furry shape of the body. Use a flat line for the bottom of the body because the fur won't be standing up there.


