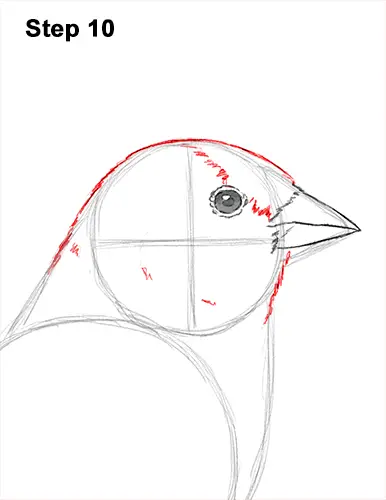
Step 10: Use the initial circle as a guide to draw the goldfinch's head. Follow the outside path of the guides as you darken the lines to create the shape of the head. Make the top, right side of the head (the forehead) curve out a bit more than the guides. Draw a diagonal line across the head made up of quick, short strokes for the color separation of the feathers.
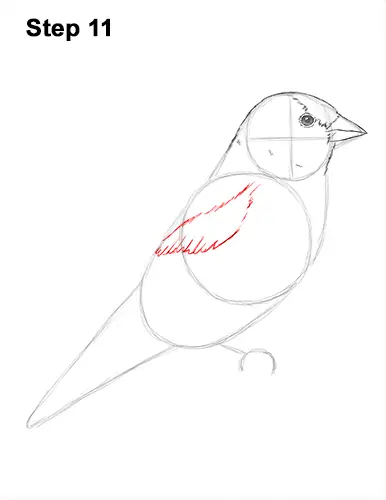
Step 11: Draw the top part of the goldfinch's folded wing using a series of curved lines on the left side of the body. Now draw quick, short strokes in the shape of an upside-down V for the top-most part of the folded wing.
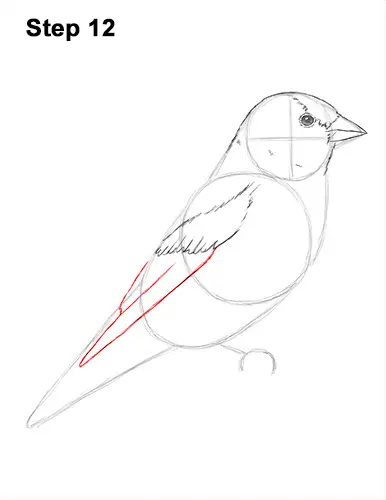
Step 12: Now draw the bottom part of the wing on the lower, left side of the body using a few diagonal lines. Follow the path of the guides and draw two shapes that are thicker at the top and thinner at the bottom. The tip of the lower shape should extend down toward the guide for the goldfinch's tail.
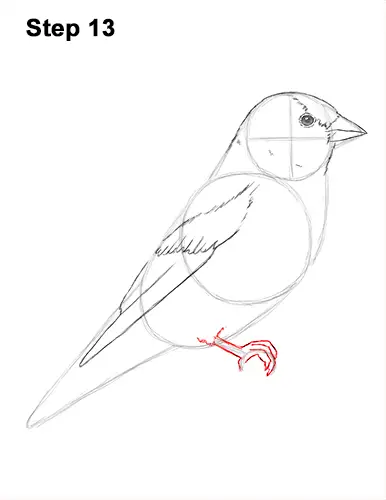
Step 13: Use the guide at the bottom to draw the leg that's on this side by first drawing a feathery base using quick, short strokes. Now make the top part of the goldfinch's leg thicker as you follow the path of the guide. Use the C-shaped line as a guide to draw the curled toes. There's a total of three toes overlapping each other in the front.
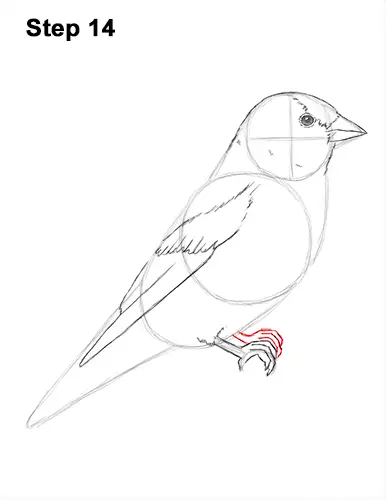
Step 14: Draw the leg on the other side of the body by using the goldfinch's first leg as a template. Most of this foot is blocked by the first foot, so only draw the visible portion.


