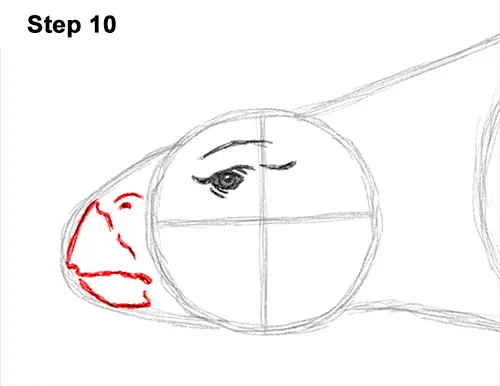
Step 10: Follow the basic path of the initial arc as you lightly sketch the shape of the muzzle on the left side. The ankylosaurus's mouth had a beak-like shape. When you get the structure right, darken the lines. Draw a couple of short, curved lines on the top, right side of the mouth for the nostril.
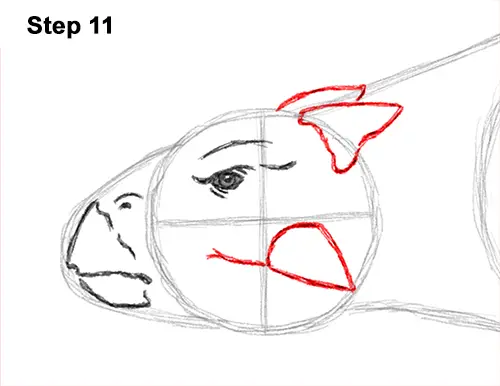
Step 11: Draw the ankylosaurus's horns on the right side of the head using shapes similar to triangles. Use the initial circle as a guide for the placement. The lower horn on the other side of the head is not visible from this angle.
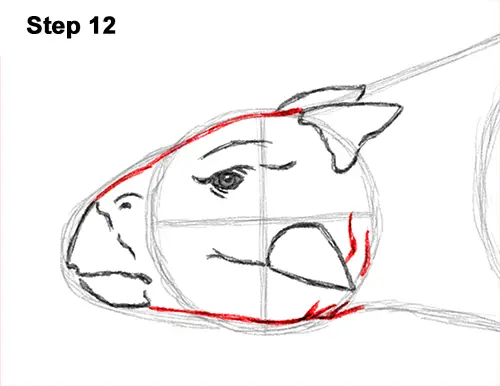
Step 12: Follow the path of the initial guides as you darken the lines to create the shape of the ankylosaurus's head.
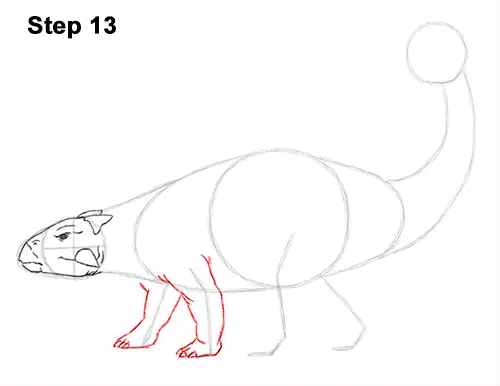
Step 13: Use the lines on the left side of the body as guides to draw the front legs. Sketch the shape of the leg lightly as you follow the guide. Darken the lines when you get the structure right. Draw the toes and claws at the bottom using a few short lines and tiny, triangle-like shapes. Draw the ankylosaurus's front leg on the other side the same way. Start with a light sketch as you follow the guide. Then darken the lines when you get the structure right. Don't forget the toes and claws at the bottom!
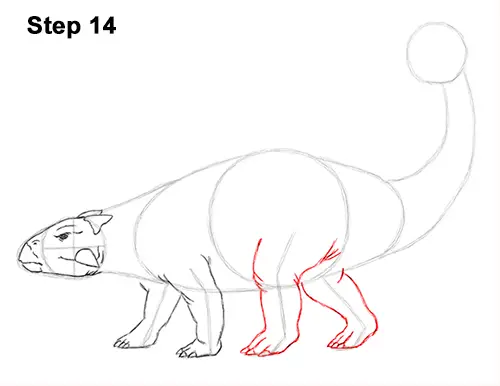
Step 14: Use the lines on the right as guides to draw the ankylosaurus's hind legs the same way as the front legs. Make the hind legs longer as you follow the basic path of the guide line and sketch lightly. Darken the lines when you get the shape right. The leg should bend at the joints near the top and at the bottom. Now use the last line as a guide to draw the hind leg on the other side of the body. This leg is farther back because the dinosaur is mid-step. Bend the leg at the jonts using curved lines.


