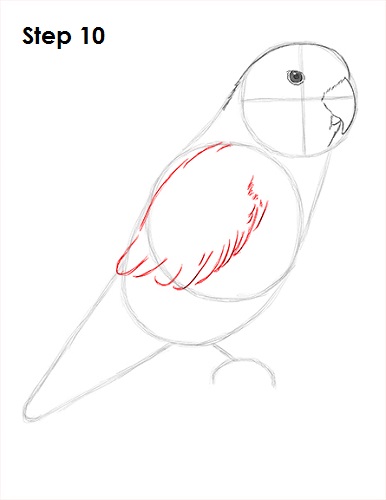
Step 10: Draw the top part of the lovebird's folded wing inside the body as a series of curved lines. The bottom part of the wing consists of short curved lines similar to the letter J along to the bottom part of the initial circle. Add the right side of the wing as more short lines within the shape of the initial circle guide.
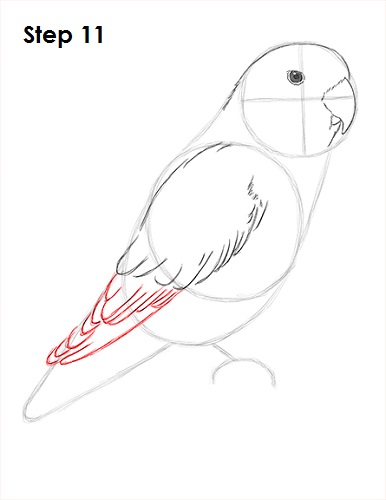
Step 11: Draw the second part of the folded wing using more curved lines under the first part of the wing. Use small curved lines of different sizes as you draw the second section of feathers. Keep adding short curved lines on the left side of the guide, then draw a longer line on the right to close the shape of the wing.
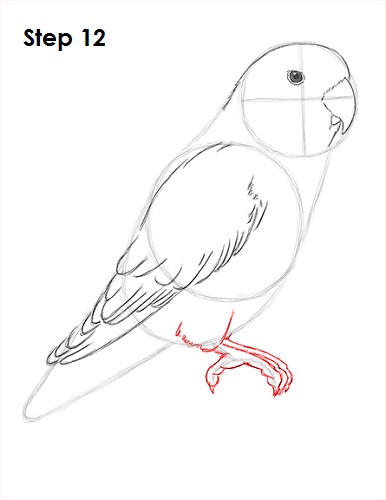
Step 12: Use the short lines under the lovebird's body as guides to draw the feet by first drawing the base using quick, short strokes. The draw the feet by following the basic path of the guide and making the shape of the feet thicker as you darken the lines.
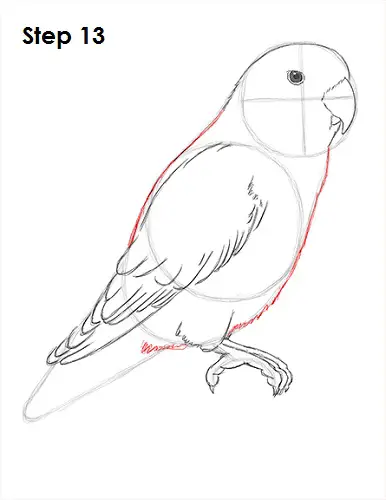
Step 13: Darken the initial guide lines to create the shape of the lovebird's body. Use quick, short strokes at the bottom to create a feathery texture.
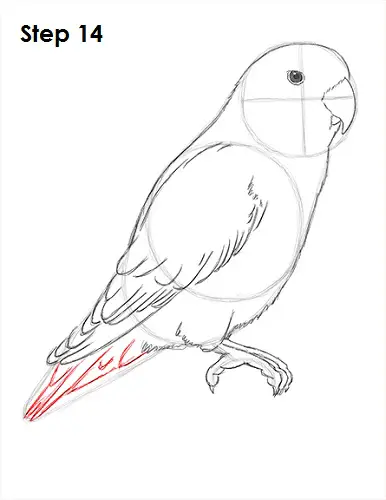
Step 14: Draw the tail within the arc shape on the lower left side.


