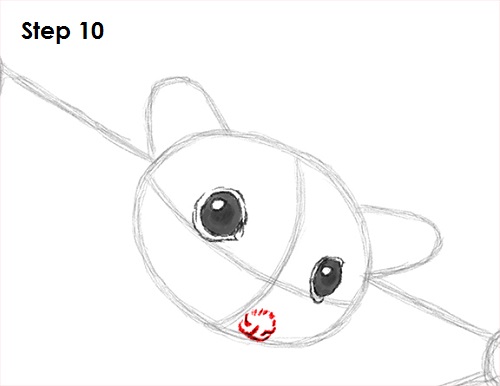
Step 10: Draw the nose on the bottom part of the sugar glider's head by first lightly sketching a circle. Use the lines as guides for placement. Darken the nose but make it a bit more square. Add a slit on each side for the nostrils and quick, short strokes at the top for fur.
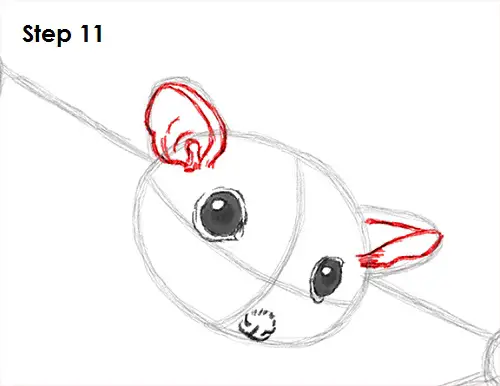
Step 11: Use the arcs on top of the head as guides to draw the ears. Follow the basic shape of the arc as you darken the lines and create the outer shape of the sugar glider's ears. Add a series of short curved lines within the ear for the inner structure. The ear on the right si facing out more, so don't give it too much detail.
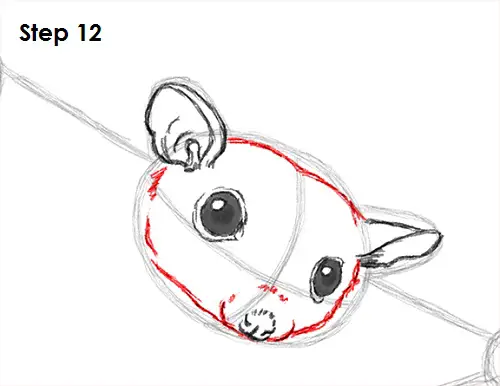
Step 12: Use the original oval as a guide to draw the rest of the sugar glider's head. Make the top of the head dip a little in the middle as you darken the line. The line for the bottom of the head should be placed a little higher than the lower edge of the oval. Add a few more lines around the nose to complete the shape of the muzzle.
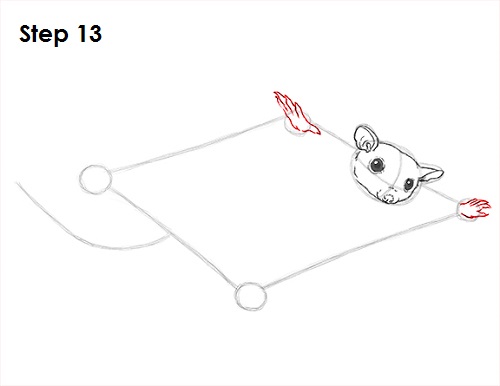
Step 13: Use the small circles on the right as guides to draw the front feet. The bottom side of the foot should fit within the circle, and the digits should come out above the circle. The toes are made up of short curved lines that come to a point at the tip. Add the other foot on the right by using the other circle as a guide. This foot should be a little smaller because of the drawing's perspective.
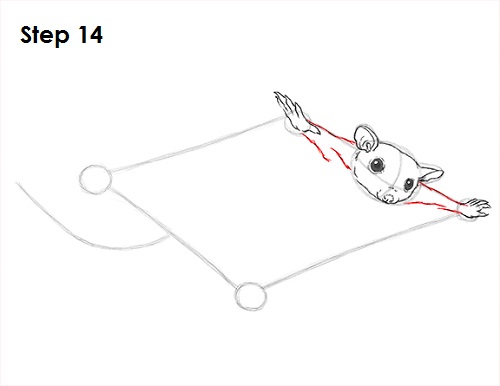
Step 14: Draw the top part of the sugar glider's legs by using the small lines as guides. Follow the basic path of the guide but make the legs thicker as you darken the lines.


