Draw Donkey 15

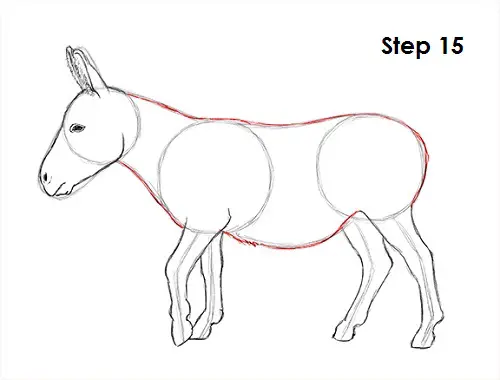
Step 15: Draw the rest of the donkey's body by using the remaining lines as guides. Follow the path of the guides as you darken the lines. Add a few bumps along the way for the muscle structure.


Draw Donkey 16

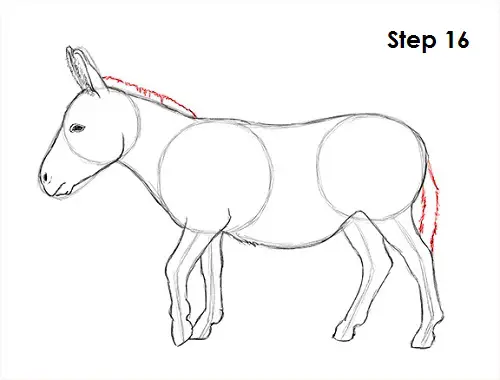
Step 16: Draw the donkey's mane and tail using a series of quick, short strokes. Don't draw each individual hair. Instead, draw the basic shape or outline of the donkey's mane and tail.


Draw Donkey 17

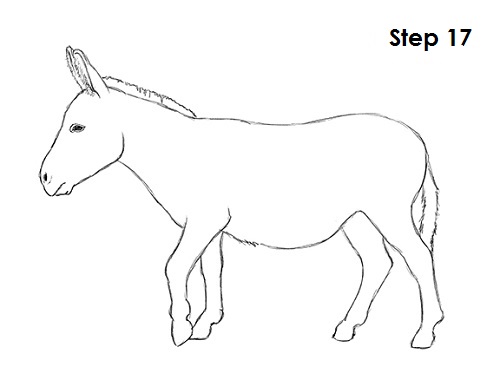
Step 17 (optional): For a cleaner look, erase as much as you can of the initial guide lines. Don't worry about erasing all of the guides. It's okay to leave some behind. Also re-draw any final sketch lines that you may have accidentally erased.


Draw Donkey

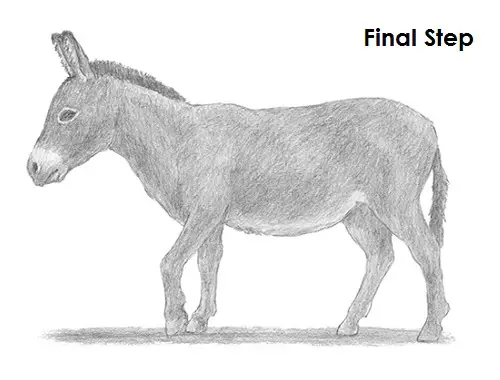
Final Step: Add some shading to your donkey drawing to give it more dimension and volume. Pick the direction of the light source when shading so that the shadows are consistent with it. Also draw a cast shadow underneath. This helps ground the donkey so it doesn't appear to be floating.

You can add more value throughout your drawing for extra detail. There are different breeds of donkeys that have a variety of coat patterns, so shade yours however you'd like. For a classic-looking donkey, add a very light value to the muzzle and a dark value to the mane. Vary the pressure on your pencil to get different degrees of tonal value. Add the value by using strokes that go in the general direction of the fur. Use a medium value throughout the entire body for a solid coat pattern. The value on the donkey's belly is a bit lighter. Some donkeys have coarse fur, so don't worry about adding the value too smoothly. It's always a good idea to use reference for a more accurate drawing. Don't forget to pause the "How to Draw a Donkey" video to draw at your own pace.

Thanks for watching! Subscribe to the How2DrawAnimals YouTube Channel for a new tutorial every Tuesday.

To learn how to draw popular cartoon characters, visit EasyDrawingTutorials.com.

Joomla templates by a4joomla