Page 3 of 4
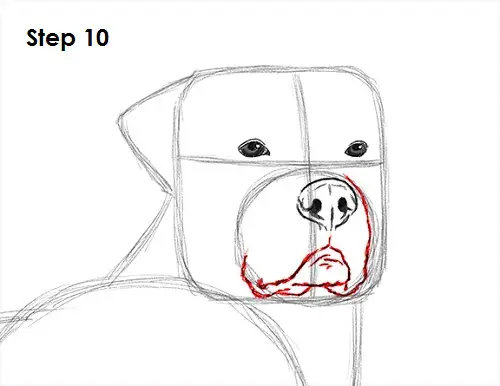
Step 10: Draw the rest of the rottweiler's muzzle by using the initial small circle as a guide. The mouth consists of a wavy line under the nose. Notice that the ends of the mouth touch the sides of the small circle. Draw the loose skin and chin under the mouth using a series of curved lines. Use the right side of the small initial circle as a guide to draw the right side of the muzzle.
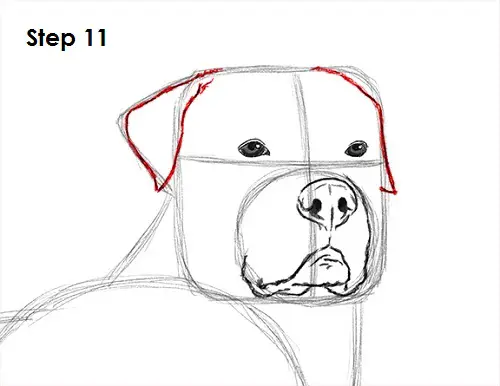
Step 11: Use the triangle-like shape on the rottweiler's head to draw the left ear. Simply darken the lines and make the shape curvier. Draw a line on the right side for the ear behind the head.
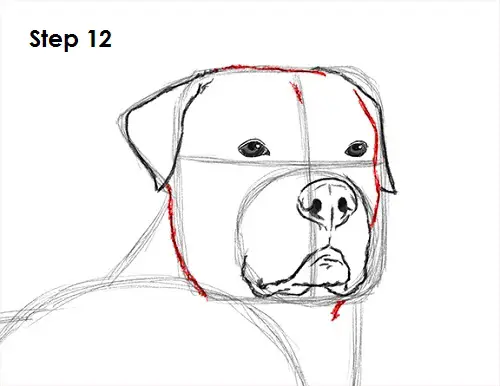
Step 12: Use the original square as a guide to draw the rest of the rottweiler's head. The line dips in a little in the middle at the top of the head and below the eye on the right. Use quick, short strokes as you draw the bottom of the rottweiler's head for a furry texture.
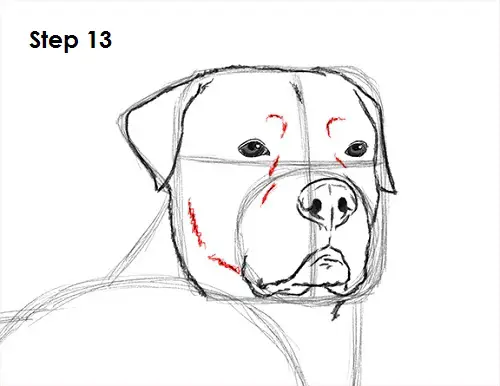
Step 13: Add a few more lines throughout the rottweiler's face for extra detail. Add a couple of lines between the eyes and a longer set of lines on the bottom left side for the jawline.
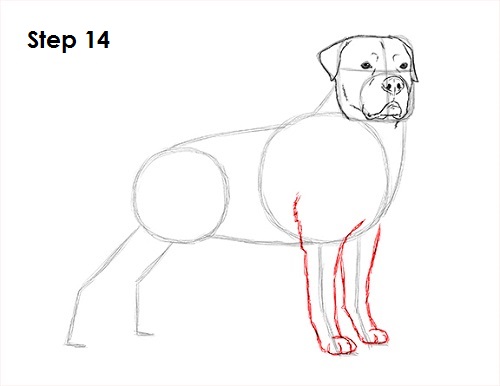
Step 14: Use the lines on the right as guides to draw the rottweiler's front legs and feet. Lightly sketch the shape of the first leg as you follow the path of the line. When you get the structure right, darken the lines. Draw a few curved lines at the end of the paw for the toes. Draw the front leg on the other side by using the other line as a guide. Draw it the same way by lightly sketching the shape first and only darkening the lines when you get the structure right.


