Page 4 of 5
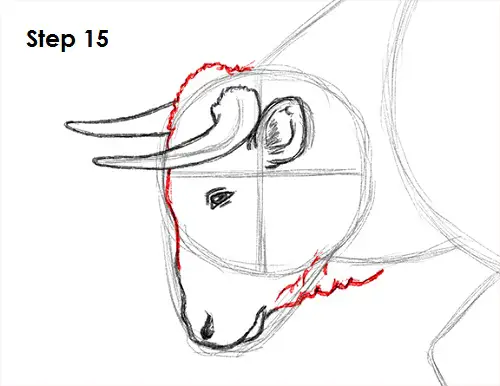
Step 15: Use the circle as a guide to draw the rest of the bull's head. Use quick, short strokes at the top of the head to represent the bull's fur. Using a series of curved lines, draw the flaps of skin on the neck at the bottom.
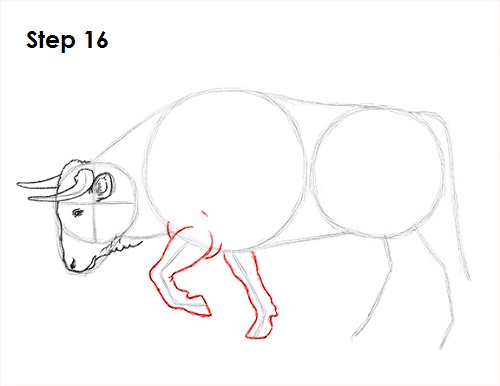
Step 16: Use the lines on the left as guides to draw the bull's front legs. Lightly sketch the shape of the leg as you follow the path of the line. When you get the structure of the leg right, darken the lines. Use curved lines to simulate the bull's joints and muscle structure. Draw an angular, square-like shape at the tip of the bull's leg for the hoof. Draw the front leg on the other side using the other line as a guide. Sketch the shape lightly at first as you follow the path of the line. Then darken the leg when you have the right structure. Use curved lines to define the muscles and joints, and draw the square-like hoof at the bottom.
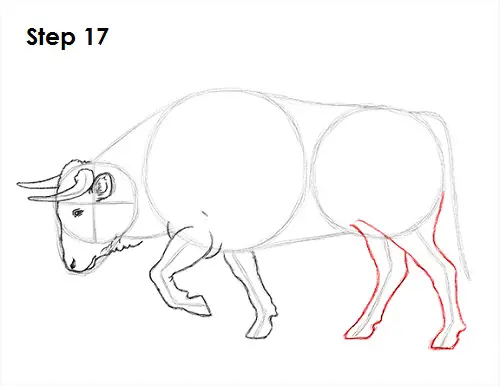
Step 17: Use the lines on the right as a guide to draw the hind legs the same way you drew the bull's front legs. Remember to sketch lightly as you follow the path of the guide and only darken the lines when you have the structure right. The top part of the hind legs is thicker and gets thinner toward the square-like hoof at the bottom. Draw the bull's hind leg on the other side using the same technique. Be sure to follow the path of the guide line to give the bull the wide stance and the charging posture.
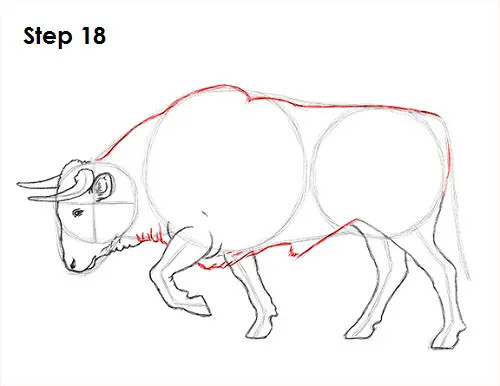
Step 18: Use the remaining lines as guides to draw the rest of the bull's body. Draw a curve at the top for a hump. Draw a bigger curve for a bigger hump. Draw curved lines at the bottom of the folds of loose skin on the bull's neck and finish out the body.
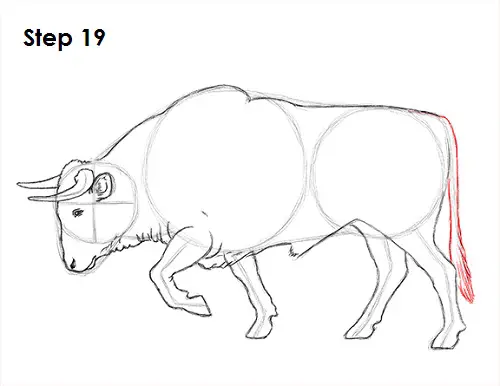
Step 19: Use the line on the right as a guide to draw the bull's tail. Draw quick, short strokes at the bottom for the hair at the end.


