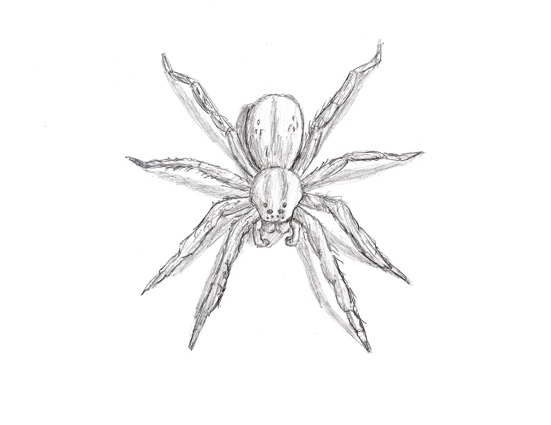
In just a few steps, you'll learn how to draw this brown recluse spider using colored pencils. All the tutorials on How2DrawAnimals.com are easy to follow and great for beginners and experienced artists alike. Get art basics while sketching your favorite animals step by step. Each free tutorial on this site has a video tutorial option, as well as step-by-step photos and written text to follow along with. Have fun drawing!

Stay tuned for more free drawing lessons by:
Liking us on Facebook>>
Subscribing on YouTube.com>>
Following us on Instagram>>
To draw this brown recluse spider step by step, follow along with the video tutorial and pause after each step to go at your own pace. You may find it easier to follow the step-by-step images below the video. The new lines in each step are shown in red, so you'll know exactly what to sketch next. You may want to open the video in a new tab and use both drawing methods. Take your time and create art at your own pace.
Below you can watch a narrated step-by-step video tutorial:
For the first few steps, don't press down too hard with your pencil. Use light, smooth strokes to begin so that it's easy to erase if you make a mistake.

Step 1: Sketch a circle and a half circle as guides for the spider's abdomen and thorax. When drawing circles, keep in mind that they don't have to be perfect. They're just guides. The half circle on the left should be almost half as big as the circle on the right.
DRAWING TIP: To draw a circle, first draw four small marks for the height and width of the circle, and then connect the marks using curved lines. Sketch lightly at first so that it's easy to erase if you make a mistake. But the circles don't have to be perfect. They're just guides.

Step 2: Add an arc to the right of the circle to complete the guide for the spider's abdomen. Then sketch in two angled lines under the front part of the brown recluse's body as a guide for the first set of legs.

Step 3: Draw three more angled lines on either side of the spider's thorax for additional legs.

Step 4: Add the final three spider legs that are on the other side of the body. These will look smaller from this angle because they are farther away from the viewer.
That's it for the initial sketch! From this point on, press harder with your pencil to get a more defined sketch of a brown recluse spider.

Step 5: Now begin adding the details to your brown recluse spider sketch. On the legs, lightly sketch each segment as you follow the basic path of the guidelines. When you get all the segments on the leg right, darken the lines. You will add hairlike bristles later on, but for now, use smooth pencil strokes.

Step 6: Use the same technique to draw the second set of legs.

Step 7: Use the initial half circle shape as a guide to sketch the front part of the body or thorax. Be sure to not draw over the legs. Add some tiny circles at the tip of the head for the spider's eyes. Also draw the pedipalp that's on this side of the body. Brown recluse spiders use their pedipalps for sensing and handling their prey.

Step 8: Finalize the spider's abdomen shape, and add in the details of the mouthparts (fangs) and second pedipalp.

Step 9: Using smooth pencil lines, begin adding the segments of the legs on the other side of the spider's body.

Step 10: Draw what is visible of the last three legs. You now have a finished sketch of a brown recluse spider! You can stop here or continue to the next steps if you want to color your drawing.

Step 11: For a cleaner look, erase as much of you can of the original guide lines. Don't worry about erasing all of the guides. The small details, including the eyes, mouthparts, and leg segments, make that hard to do! It's okay to leave some sketch lines behind. Re-draw any final lines that you may have accidentally erased.

Final Step: With colored pencils, add value throughout your brown recluse spider drawing for extra detail. Outline the body and legs with the darkest color. Quick, short pencil strokes coming off the body and legs will indicate the spider's bristles or hairy texture. Using shades of brown, vary the pressure on your pencils to get different degrees of tonal value along the segments on the legs. Use black on the eyes, leaving a very tiny bit white for glare, if you can. When adding color to the thorax and abdomen, note the light source (coming from the top, right) will create the darker shadows on the left and shine on the right. Add some texture and coloration to the spider's body with some spots and random lines. It's always a good idea to use multiple references when drawing and coloring animals. Studying various images of brown recluse spiders will help you when rendering your own drawings!
Finally, add a cast shadow underneath. This helps ground the spider so it doesn't appear to be floating. Use dark strokes near the middle of the shadow and lighter strokes along the edge for the shadow's diffusion.
Thanks for visiting! Subscribe to the How2DrawAnimals YouTube Channel for a new tutorial every week.
To learn how to draw popular cartoon characters, visit EasyDrawingTutorials.com.
To learn how to draw Manga, visit How2DrawManga.com.
RELATED TUTORIALS
 |
 |
 |


