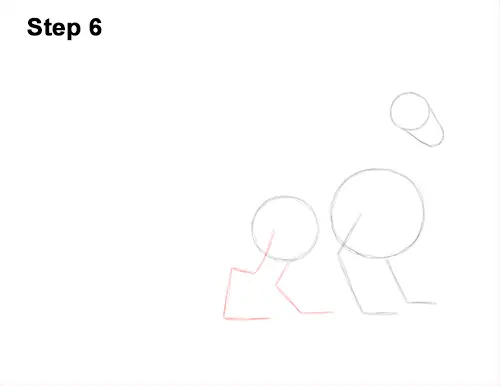
Step 6: Draw another angled line under the circle on the left as a guide for the first hind leg. This line should bend twice in the middle for the joints and once at the bottom for the ice dragon's foot. Add another angled line to the right as a guide for the other hind leg.
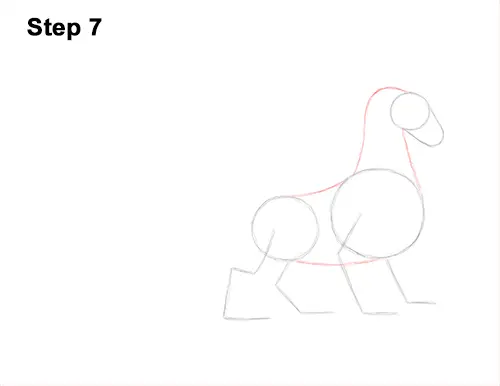
Step 7: Draw two curved lines to connect the head to the body and form the guide for the neck. The line on the left should curve a lot at the top. Use two lines to connect the first two circles together and form the rest of the ice dragon's body.
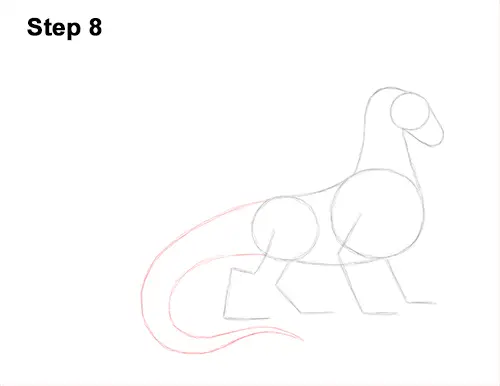
Step 8: Draw a long, curved line that starts on the top, left side for the first part of the ice dragon's tail. The line should curve, and the end of it should be under the guide for the hind legs. Sketch the line lightly so that it's easy to erase if you make a mistake. Draw another curved line that starts closer to the hind legs to complete the shape of the dragon's tail. The two lines should meet under the hind legs to form a pointy tip.
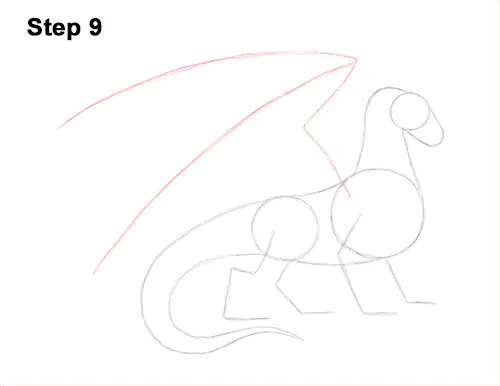
Step 9: At the top of the very first circle, draw a long, angled line for the first part of the wing. At the top of this line, draw another long line that curves to the left for the top of the wing. The longer you make these lines, the bigger the ice dragon's wings will be. Add another long, curved line in the middle to finish the guide for the wing.
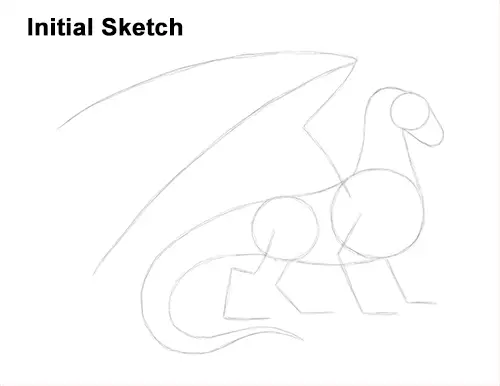
That's it for the guides! From this point on, press harder with your pencil for a more defined drawing.


