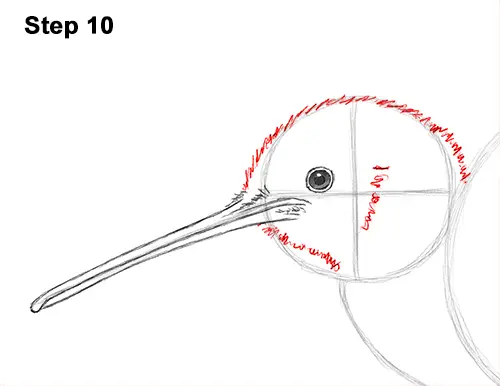
Step 10: Use the initial circle as a guide to draw the rest of the kiwi's head. Use a series of quick, short strokes as you draw the shape of the head to represent feathers. Follow the basic path of the initial circle but make the shape of the head a bit wider on the sides. Add a few more quick, short strokes within the bird's head, to the right of the eye, for the ear opening.
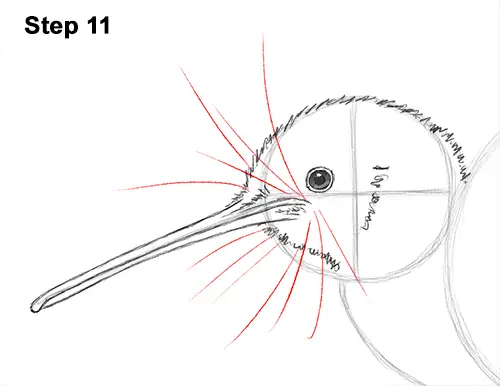
Step 11: Draw a series of long strokes at the base of the kiwi bird's beak for the whisker-like feathers found there. The whiskers don't have to look exactly like this. Just add random lines at the base of the beak.
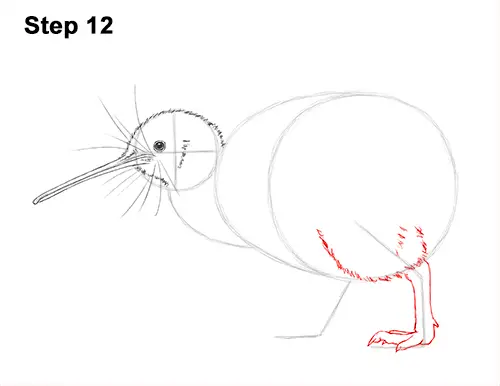
Step 12: Use the line under the body, on the right side, as a guide to draw the kiwi's first leg. First draw a U-shaped line at the top of the guide, inside the body, for the base of the leg. The base of the leg should be made up of quick, short strokes to represent the feathers. Now follow the basic path of the guide as you make the shape of the leg wider. Follow the path of the guide as it bends to create the shape of the foot and toes. The toes should end in a sharp spike for the claws. The toes should overlap each other a bit. Kiwi birds have three toes that point forward, but because of the angle, only two will be visible.
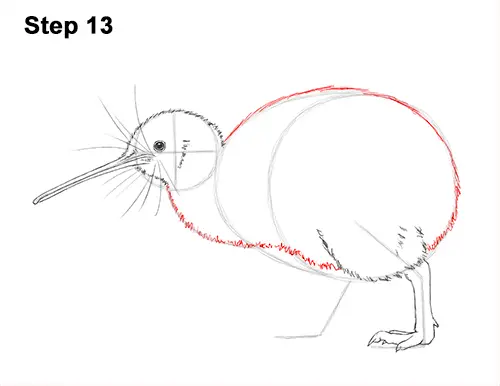
Step 13: Use the initial lines and shapes as guides to draw the rest of the kiwi's body. Simply darken the outer edges of the guides to create the body. Use quick, short strokes for a feathery texture. As you draw the underside of the body, make the line curve more to give the midsection a small indentation.
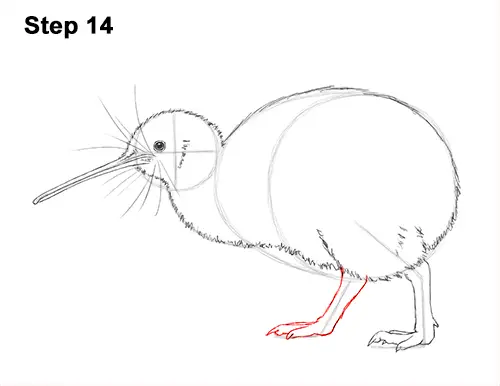
Step 14: Use the last line under the kiwi's body to as a guide draw the second leg the same way as the first. Make the shape of the leg thicker as you follow the basic path of the guide. Draw the foot and toes where the guide bends. Draw a short, curved, spike-like shape at the end of each toe for the claws.


