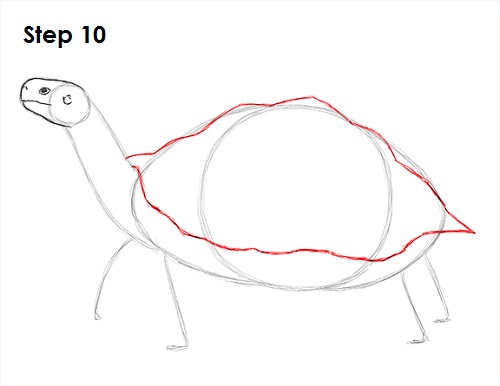
Step 10: Use the initial shapes as guides to draw the outline of the top part of the tortoise's shell. Draw the top part by following the path of the shapes as you darken the line. Give the line a few angles as you draw it to make the shell bulkier. Now draw the bottom line of the top shelf the same way but a little less angular.
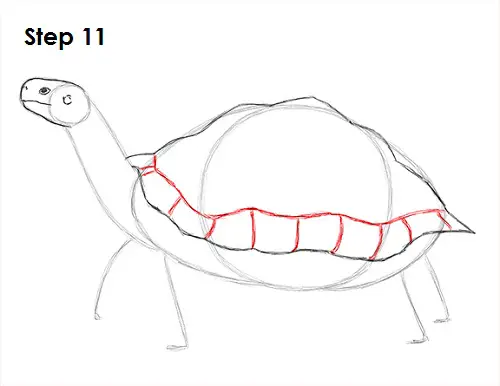
Step 11: Draw the top shell's pattern on the bottom edge using a series of lines. Draw a line near the bottom that's almost parallel to the bottom edge. Add a few shorter lines with a vertical orientation in the gap between the two lines.
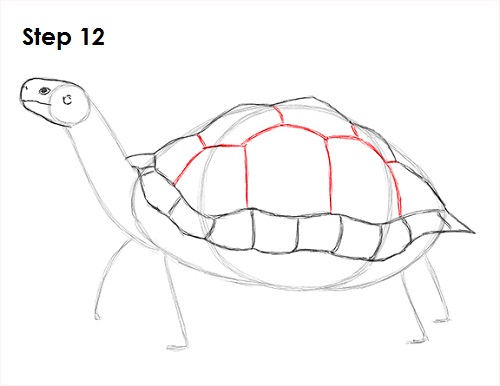
Step 12: Draw the pattern on the top part of the tortoise's shell using a series of lines. The shapes along the bottom are similar to pentagons. Pause the video after each stroke if you need help creating the pattern. The shapes at the very top are created by joining the pattern with the top edge using a few lines.
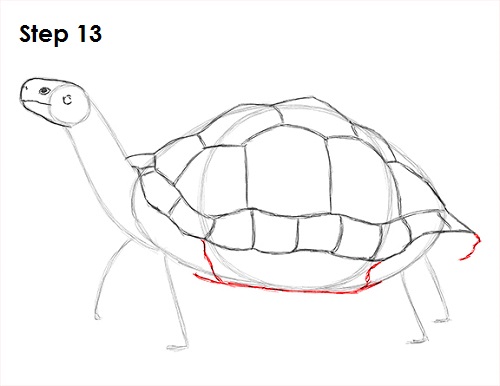
Step 13: Draw the tortoise's bottom shell using the initial shapes as guides. Darken the bottom edge of the shell, then add a couple of lines near the initial circle for the shell's opening for the legs.
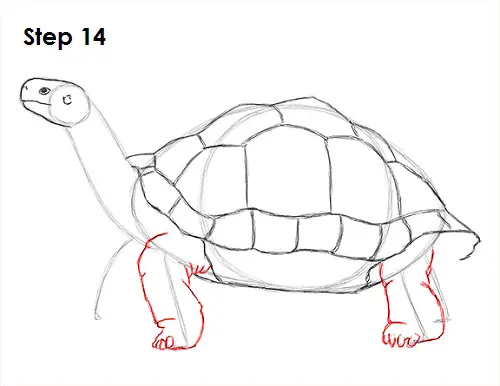
Step 14: Use the lines under the shell as guides to draw the legs that are on this side of the body. Lightly sketch the shape of the leg as you follow the basic path of the line. When you get the structure of the tortoise's leg right, darken the lines and add a few wrinkles along the way. The leg and foot should be thick, similar to a short column. Add a few curved lines at the bottom for the claws. Draw the hind leg on this side of the body the same way. The leg should be thick, bulky and wrinkly. Add the claws on the tips of the feet using curved lines.


