Page 3 of 4
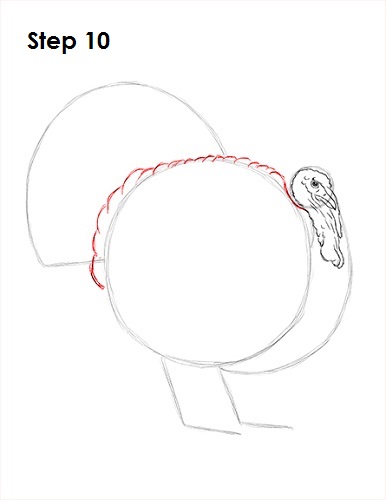
Step 10: Use the original circle as a guide to draw the top part of the turkey's body. Follow the edge of the circle as you draw small curved lines overlapping each other to form the feathers.
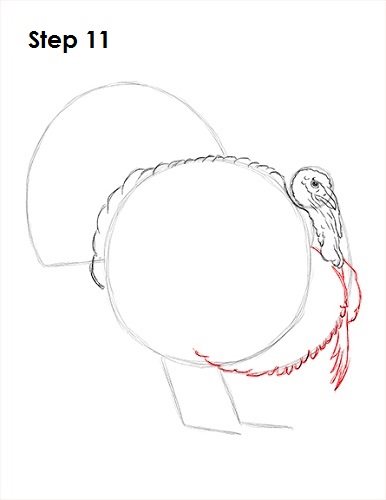
Step 11: Use the curved line as a guide to draw the front part of the turkey's body. Draw small curved lines along the path of the guide line for the turkey's chest feathers. Add the chest feathers on the other side and a few long lines for the feathers in between called a beard.
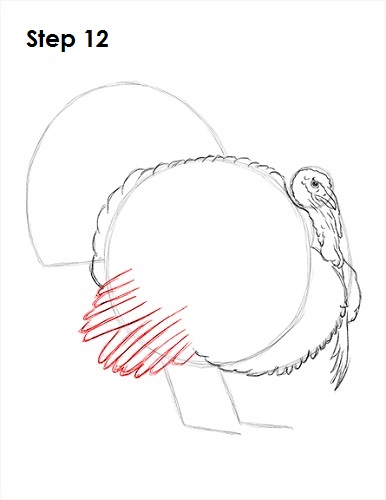
Step 12: Draw the turkey's wing feathers on the lower left side of the main circle, which just consists of a series of long lines that curve along the bottom. The top set of lines has a diagonal orientation, while the set under them is a bit more vertical.
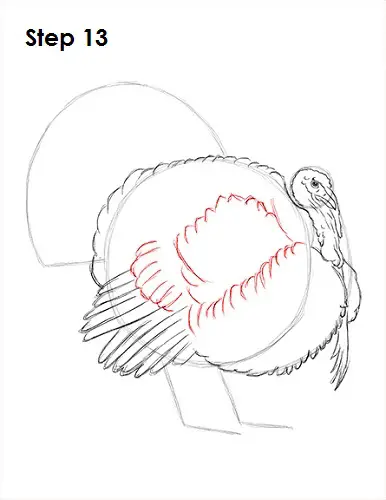
Step 13: Add a few more small curved lines inside the body for the edges of the wings and chest feathers. The first row of curved lines is inside the circle on the lower right side. The second set is shaped like an arc above it. The last set of curved lines is close to the wing on the left side.
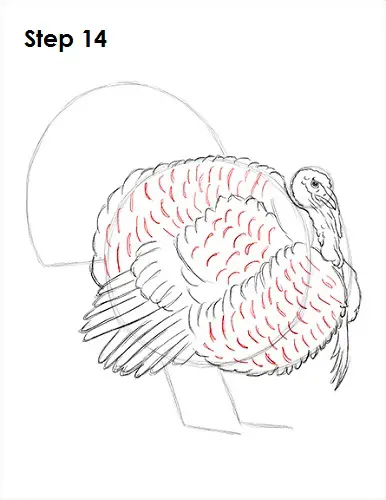
Step 14 (optional): Add a few more curved lines within the shape of the body for more feathers. Don't worry about this step too much if you plan on shading your drawing later on. Your curved lines don't have to be exact. Just add them all over the turkey's body. Don't overthink these lines but try to draw them with the proper orientation.


